1.Introduction
This Quick Start Guide explains the basics: how to connect and set up your target on the network; how to install the SDK; how to build the firmware images,and how to use gateway。 The Linux Software Developer’s Kit (SDK) is an embedded hardware and software suite that enables Linux developers to create applications on Dusun’s DSGK-061 gateway. Base on the 4.19.232 Linux kernel, and leveraging existing open source software, the SDK simplifies the process of adding custom applications. Device drivers, GNU toolchain, Pre-defined configuration profiles, and sample applications are all in included.
2.Gateway Information
2.1 Basic information
- SOC: RK3568
- Quad-core ARM Cortex-A53
- Mali-450MP2 GPU
- Power Supply: DC-12V
- LTE module: EG95 (LET CAT-4)
- Wi-Fi module: 6221A (Wi-Fi chip: RTL8821CS)
- eMMC: 64GB
- SDRAM: 4GB
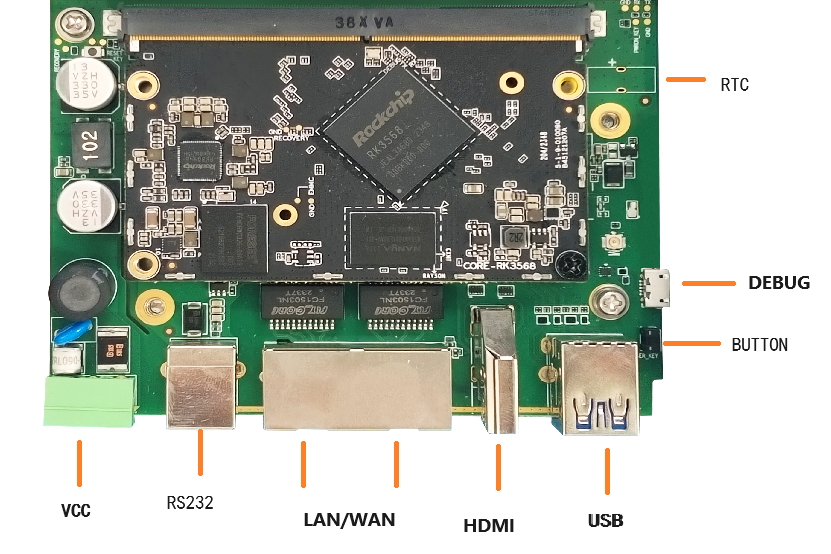
2.2 Interface
3.Target Setup
This section describes how to connect the gateway into your host computer and network.
- Connecting a gateway - Power
- Make sure that the power adapter is 12V/2A.
- Select the appropriate power plug adaptor for your geographical location. Insert it into the slot on the Universal Power Supply; then plug the power supply into an outlet.
- Connect the output plug of the power supply to the gateway
- Connecting a gateway – ADB 1.Connect one end of the usb cable to the usb port on the laptop or desktop 2.Connect the other end of usb cable to the debug port on the gateway. 3.adb shell login gateway .
4.Compile the Environment to Build
Please use ubuntu 18.04 .iso image to setup your build environment. You can use a virtual machine or a physical PC to install ubuntu 18.04.
4.1Virtual Machine
It is recommended that novice users use virtual machines, install ubuntu 18.04 to the virtual machine, and leave enough disk space (at least 100G) for the virtual machine.
4.2Ubuntu PC Compile the Environment to Build
The use of physical machine compilation users can use a ubuntu PC.
5.SDK Acquisition and Preparation
5.1Download the source code from the Dusun FTP
The source package name will be rk356x_linux-*.tar.gz, get it from Dusun FTP.
- Google driver URL: https://drive.google.com/drive/folders/1jx_tjzgsouQT8lE8_OgguQDlGUt95Qqq?usp=drive_link
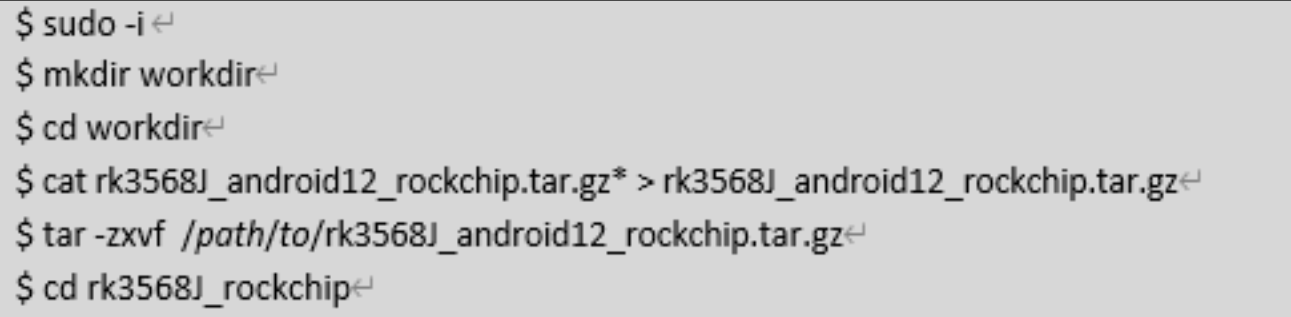
5.2Code Compression Package Check
The next step can be taken only after generating the MD5 value of the source compression package and comparing the MD5 value of the MD5 .txt text to confirm that the MD5 value is the same, and if the MD5 value is not the same, the energy code pack is damaged, please download it again.
$ md5sum rk3568J_android12_rockchip*.tar.gz
5.3 The Source Compression Package is Unzipped
Copy the source code to the corresponding directory and unzip the source code compression package.
5.4 Image Downloads
- Get Image Url: https://drive.google.com/drive/folders/1TltWhG_QSg4emOgspspTGvJZZ4Ce1AJD?usp=drive_link
6. Code Compilation
6.1 Start Compiling
Build a complete directory of firmware files:rockdev/Image-rk3568_s/*.img , update.img includes all firmware for full upgrade.
$ source build/envsetup.sh
$ lunch
$ ./build.sh  -UKAu
The build will take a long time, please wait patiently. After update.img is built, burn it to the board according to chapter 7.
6.2 Compiled Each Image Part Separately
6.2.1 The build system and the image structure
The upate.img is composed of several parts. Main parts are uboot.img, boot.img, recovery.img, rootfs.img. uboot.img contains bootloader uboot boot.img contains the device tree .dtb image, Linux kernel image super.img: The android rootfs image. In normal mode, system boot and mount this rootfs image. You may need to build the images separately, especially when you focus on single module (e.g. uboot or kernel driver) development. Then you can build only that part of image and update that partition in flash.
6.2.2 Build Uboot only
$ ./build.sh -U
6.2.3 Build Linux Kernel Only
$ ./build.sh -K
6.2.4 Build System Only
$ ./build.sh -A
6.2.6 Final Image Packaging
$ ./build.sh -u
This command making rockdev/Image-rk3568_s/*.img scatter firmware packaging builds in the directory update.img
7. Hardware interface development
7.1 RS232
View serial port information by /dev/ttyS9
#cat /dev/ttyS9
7.2 LAN/WAN
The gateway has two network ports:eth0 and eth1. Both network ports can switch between LAN and WAN
#ifconfig
eth0      Link encap:Ethernet  HWaddr 66:89:a0:a7:56:8d  Driver rk_gmac-dwmac
          inet addr:192.168.1.177  Bcast:192.168.1.255  Mask:255.255.255.0
          inet6 addr: fe80::9c9f:2e5e:b548:1169/64 Scope: Link
          UP BROADCAST RUNNING MULTICAST  MTU:1500  Metric:1
          RX packets:124 errors:0 dropped:0 overruns:0 frame:0
          TX packets:94 errors:0 dropped:0 overruns:0 carrier:0
          collisions:0 txqueuelen:1000
          RX bytes:23808 TX bytes:14608
          Interrupt:38
eth1      Link encap:Ethernet  HWaddr 62:89:a0:a7:56:8d  Driver rk_gmac-dwmac
          UP BROADCAST MULTICAST  MTU:1500  Metric:1
          RX packets:0 errors:0 dropped:0 overruns:0 frame:0
          TX packets:0 errors:0 dropped:0 overruns:0 carrier:0
          collisions:0 txqueuelen:1000
          RX bytes:0 TX bytes:0
          Interrupt:43
7.3 HDMI
Access to HDMI can display the desktop system.
7.4 USB
The gateway has two USB ports,but only the USB above can be freely used.The below USB port and debug port are shared

Usb mode: echo 21 > /sys/class/gpio/export echo out > /sys/class/gpio/gpio21/direction echo 1 > /sys/class/gpio/gpio21/value echo host > /sys/devices/platform/fe8a0000.usb2-phy/otg_mode Debug mode: do nothings
7.5 Debug
adb shell enter debug mode
7.6 Button
gpio13 used by button. Use command: echo 13 > /sys/class/gpio/export echo in > /sys/class/gpio/gpio13/direction echo both > /sys/class/gpio/gpio13/edge;
7.7 RTC
Use rtc-pcf85063 as rtc0 , hwclock can cat
#hwclock
2024-07-06 03:03:55+0000
7.8 SD
SD card slot on the back of the board
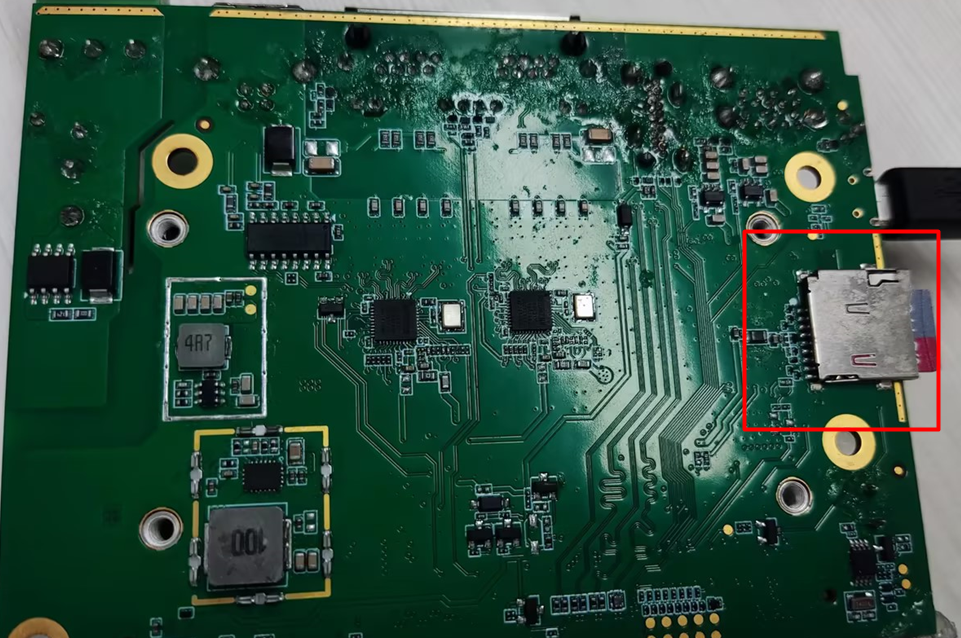
# mmc0: new ultra high speed SDR104 SDHC card at address aaaa
mmcblk0: mmc0:aaaa SC32G 29.7 GiB
[ mmcblk0: p1
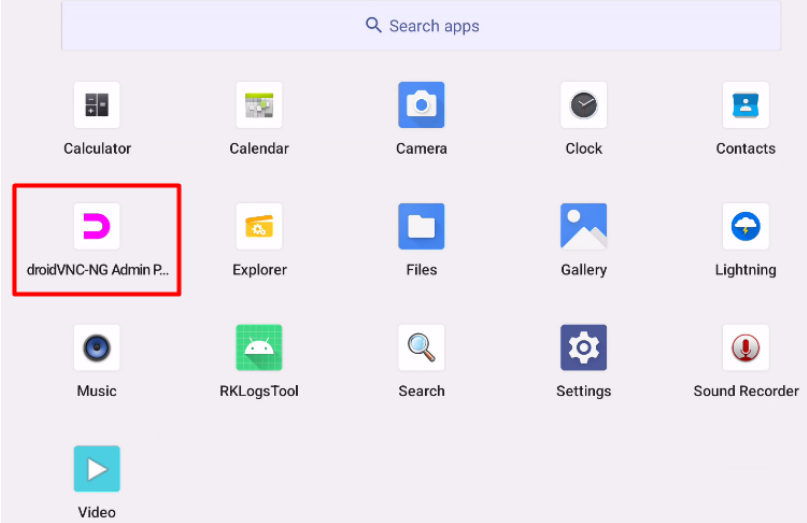
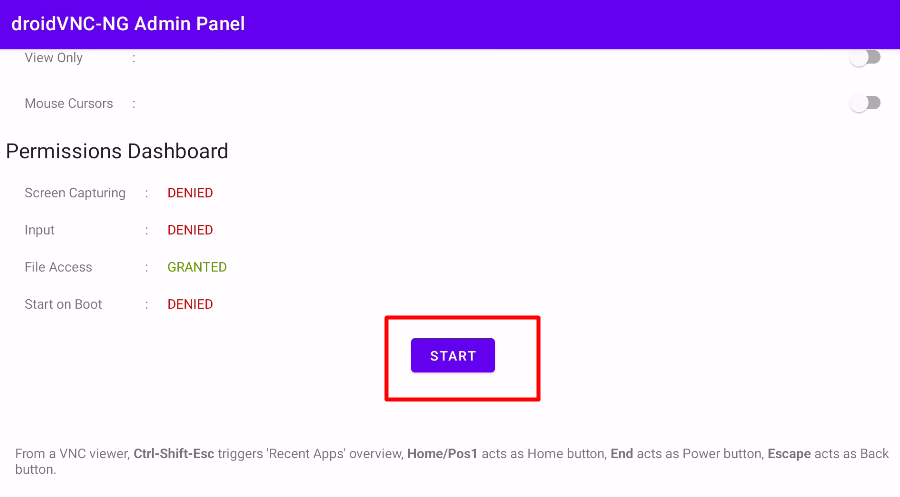
8. VNC Use
The main purpose of using VNC (Virtual Network Computing) on Android devices is to achieve remote desktop control. VNC allows you to control another device or computer (server) on one device (client). For Android devices, you can either set it as a VNC server (for other devices to remotely control it) or as a VNC client (for controlling other VNC servers)
Network topology and configuration

The gateway has an Ethernet port (as a WAN port), a dual band WiFi radio (operating in the 2.4G frequency band). Pc access gateway vnc sever by lan or wifi, Mobile phone access vnc sever by wifi
VNC use rule, this is an example from gateway firmware.
- Name: VNC forwarding
- Protocol: TCP
- Source zone: wan may be "internet", "ap", something that suggests the external source.
- xternal port: 5900 by default or whatever you specified in the app.
- Destination zone: lan something that suggests local network.
- Internal IP address: your device's local IP address, leaving any is less secure. The device's address may change over time! You can look it up in your routers' connected clients info.
- Internal port: same as external port.
Use example :
open vnc
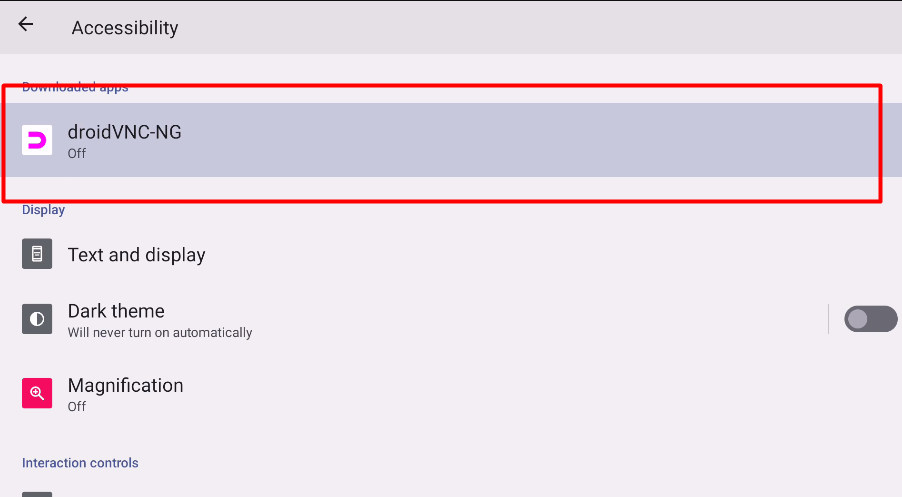
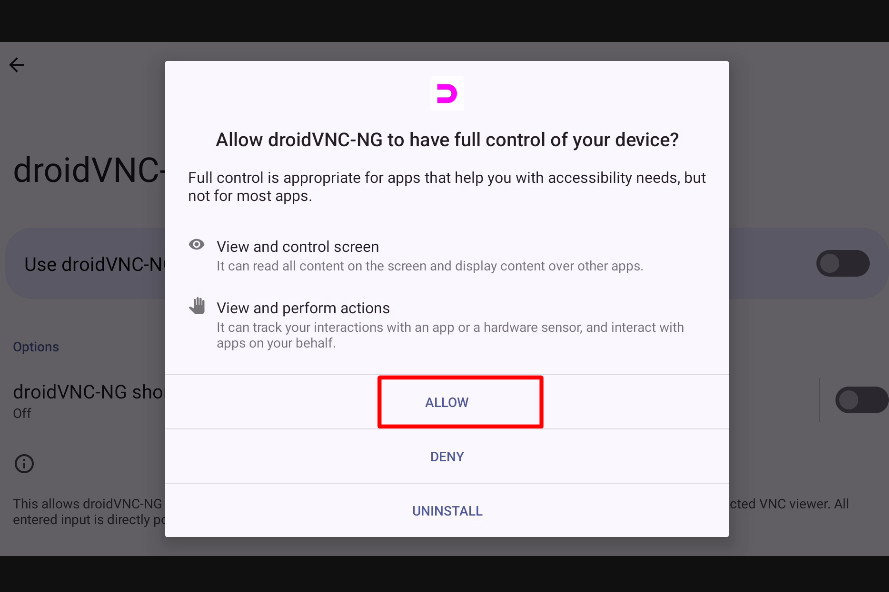
 Granting permissions:


 Open VNC client on PC,enter IP address and port. Ip is the gateway IP,port is 5900.

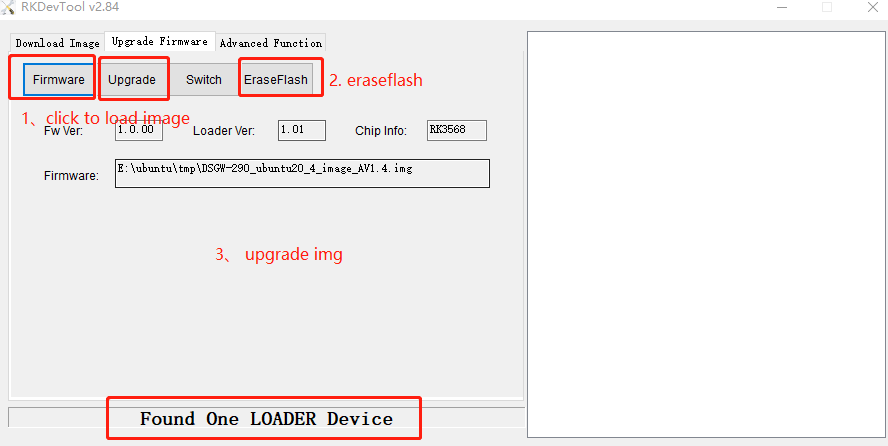
9. Image Upgrade
9.1 Upgrade Tool
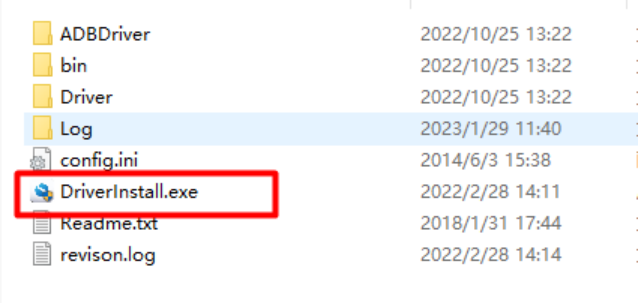
Upgrade tool:AndroidTool_Release_v2.84. Upgrade driver:DriverAssitant_v5.12
use the upgrade tool, must first exe DriverInstall.exe in DriverAssitant_v5.12
9.2 Go into Upgrade Mode by ADB Switch
Connect the OTG port to the burning computer USB port, it's also act as POE power supply 2、click ADB switch in AndroidTool
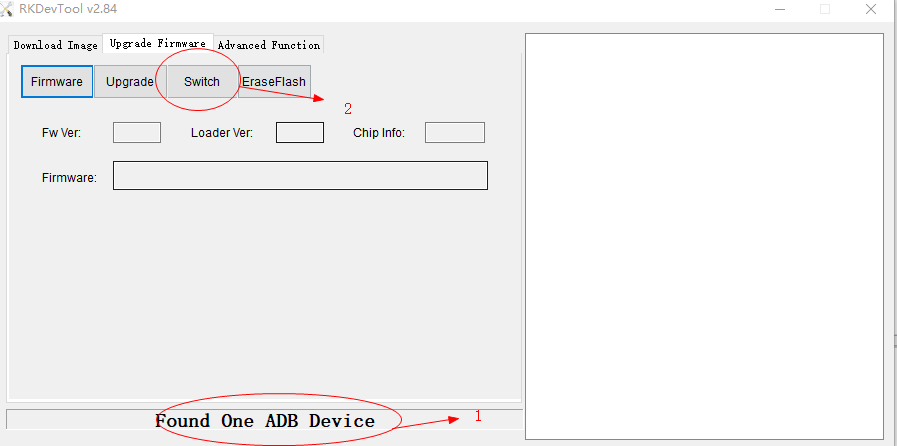
system reboot the board into LOADER mode, for a complete "update.img" upgrade.

9.3 The Entire Package of Firmware "XXX*.img" Upgrade