User Manual For HA OS
1. Introduction
1.1 Purpose& Description
This document provides a comprehensive guide to setting up and using the Home Assistant OS on the DSGW-210 gateway. It includes configuration instructions for Bluetooth, Zigbee, Z-Wave, Wi-Fi, and LTE modules, along with LED indicator status rules and a guide on how to disable the battery.
1.2 Product List
| Product list | Number |
|---|---|
| Smart Gateway | 1 |
| Network Cable | 1 |
| USB Power Cable | 1 |
| Power adapter(EU or US) | 1 |
| Mounting bracket | 1 |
| Expansion screw | 3 |
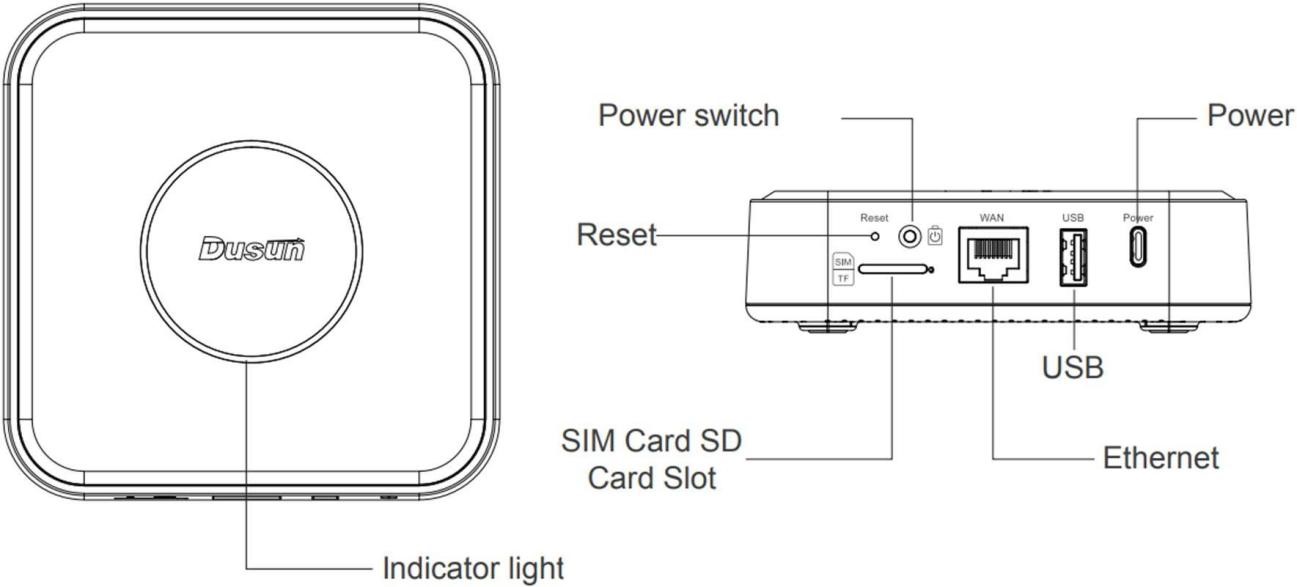
1.3 Appearance Description
| Feature | Description |
|---|---|
| Power | USB type-C power supply |
| USB | USB peripheral interface |
| Indicator | RGB LED, Indicate the working status of the gateway |
| Ethernet port | This port connects to the LAN port of router |
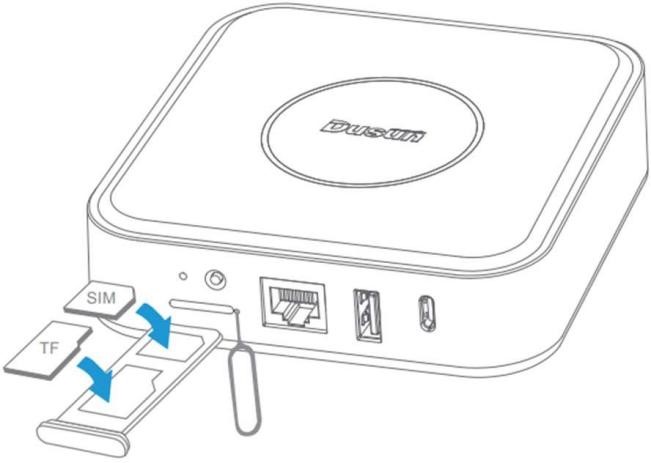
| SIM/TF card slot | Insert the SIM card and TF card |
| Reset hole | Restart |
| Power switch | Power on the backup Li battery |
2. How To Use
2.1 Preparation before start
Open the package, find the USB data cable, USB power Adapter, network cable.According to the content of the document, ensure that the equipment is working properly.
2.2 Indicator Light Description
| Light | Description |
|---|---|
| Red light | Start-up is completed after the device is powered on |
| Blue light | Connecting to the network successfully |
| Green Light | 4G LTE dialing |
| Blue light turn circle | Connecting to the network |
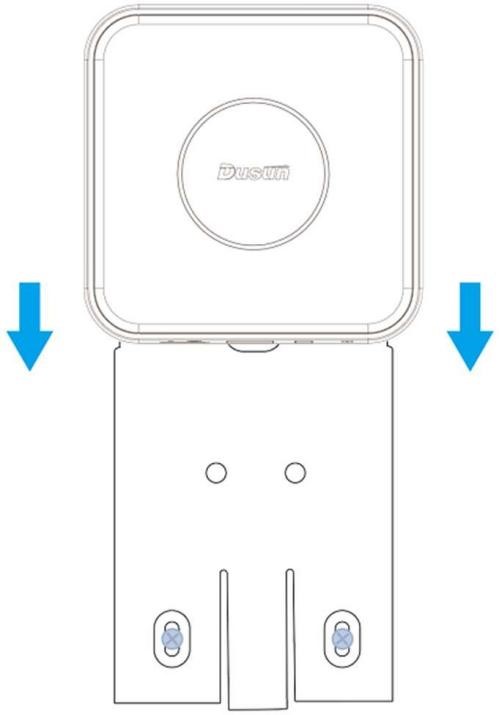
2.3 Installation Method
you can install the brackets with Expansion screw into wall or roof, then insert the gateway.
3. Operate Home Assistant
Please note, the following are screenshot guides of actual operations. In different versions of Home Assistant, the UI details of the operating interface may vary, but the operational logic remains the same.
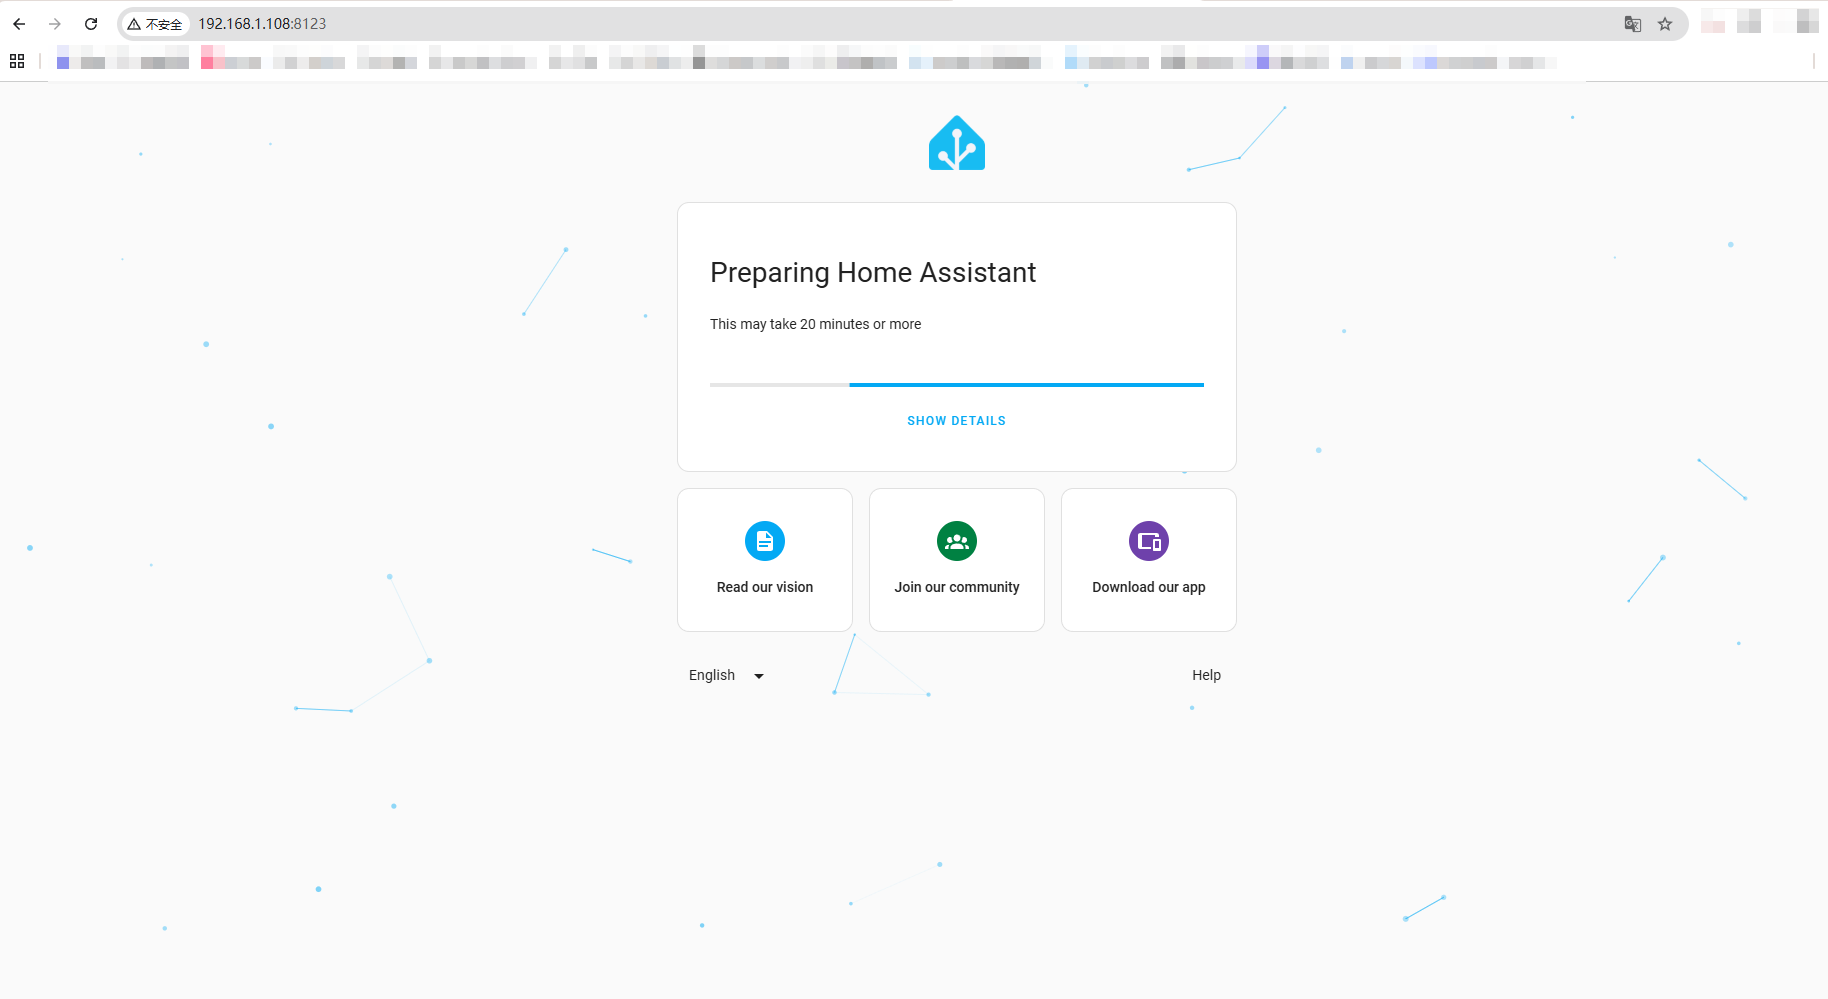
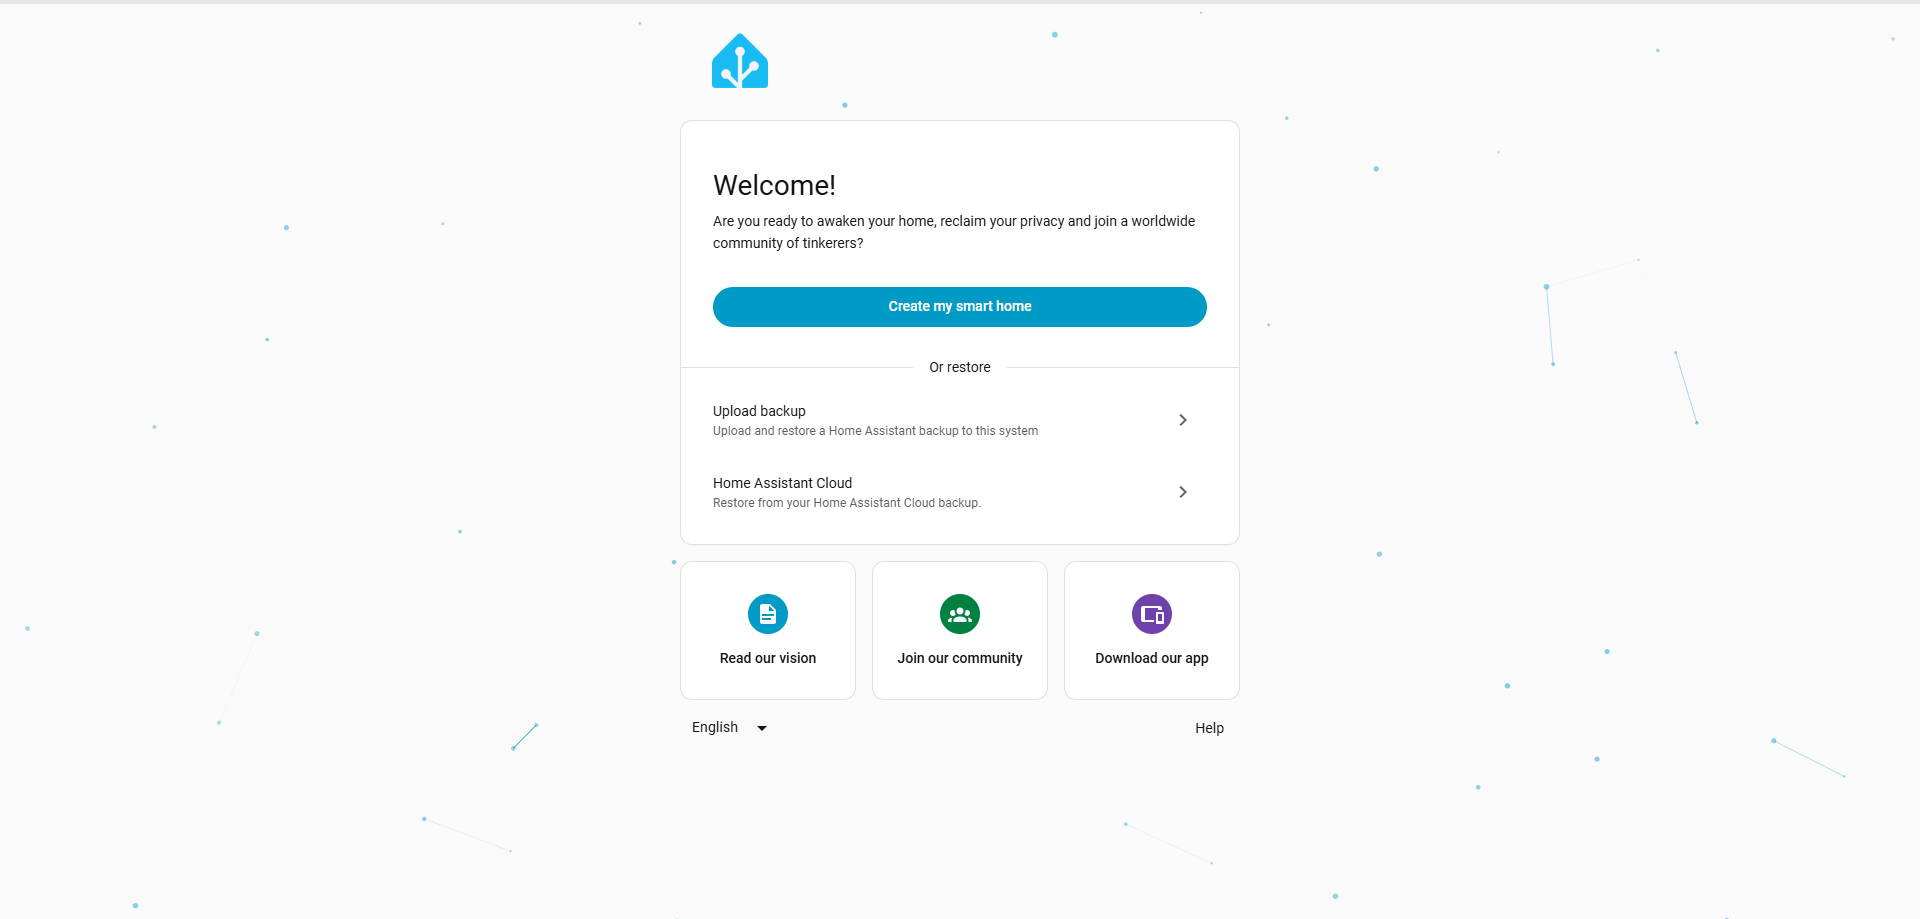
3.1 Home Assistant Web Login
Enter in the browser: Gateway IP:8123
Upon first launch, Home Assistant will automatically download and install necessary components. This process may take a significant amount of time. Please be patient and ensure a stable internet connection.
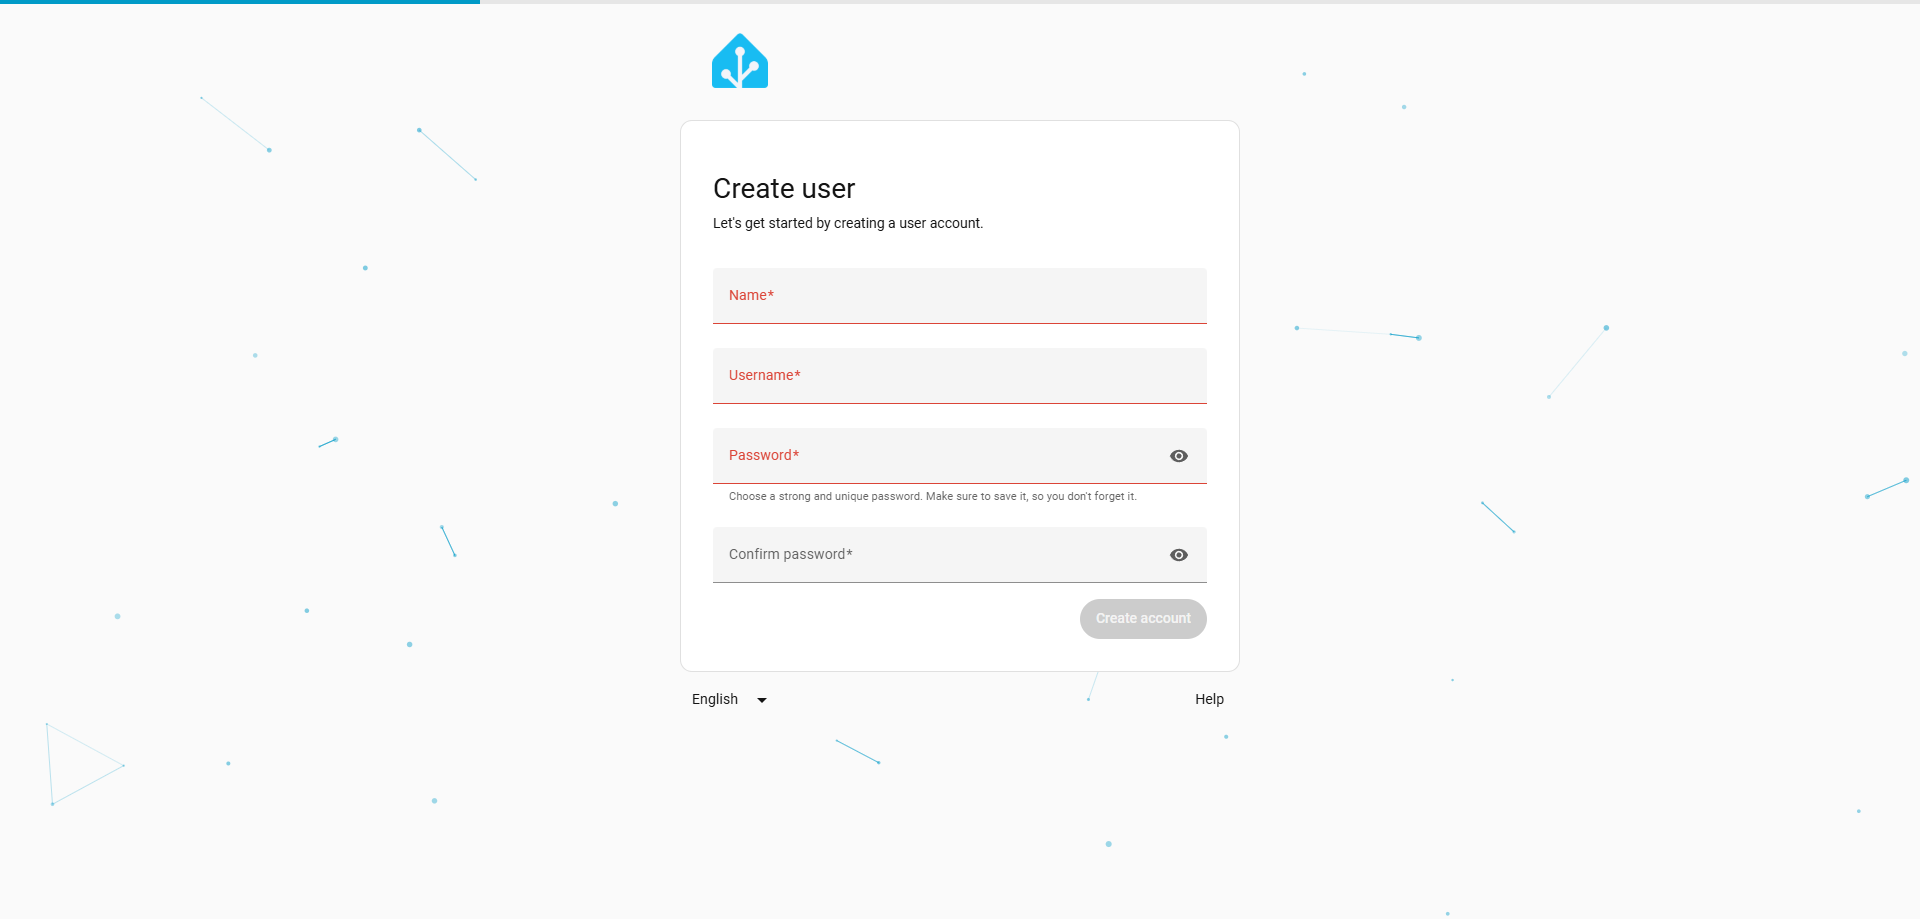
 Upon successful launch, you may commence configuring your account information.
3.2 Zigbee Configure
3.2.1 Install Add-on
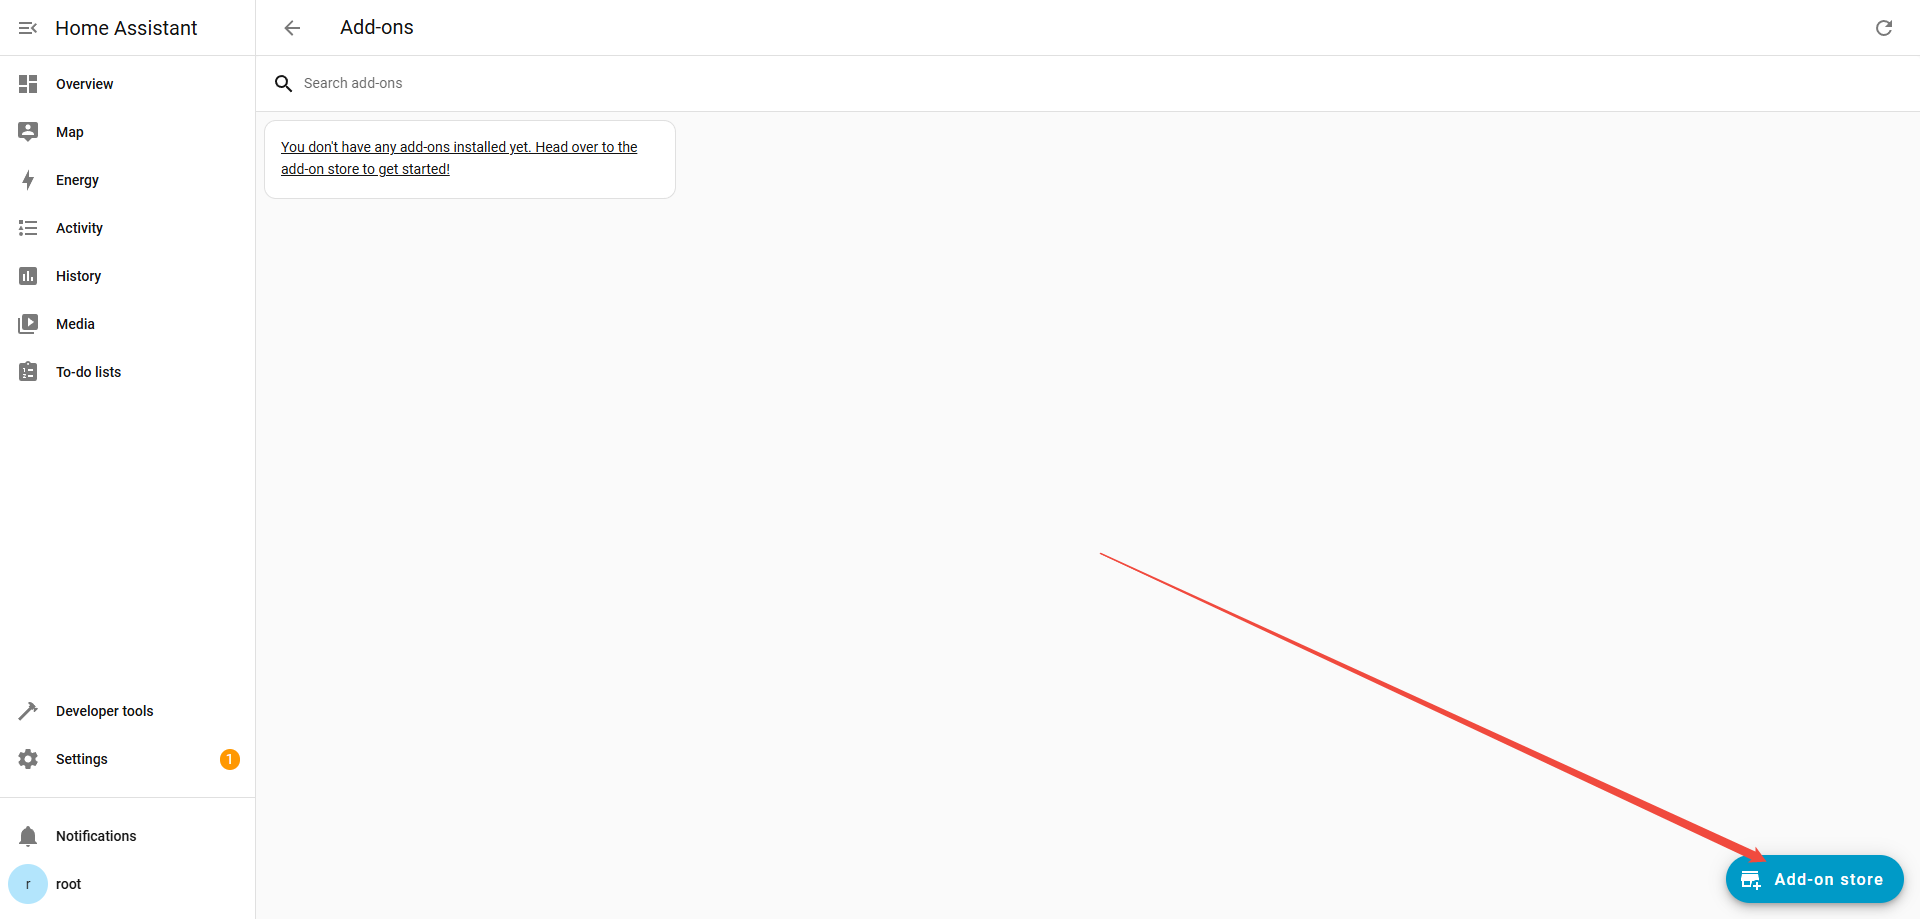
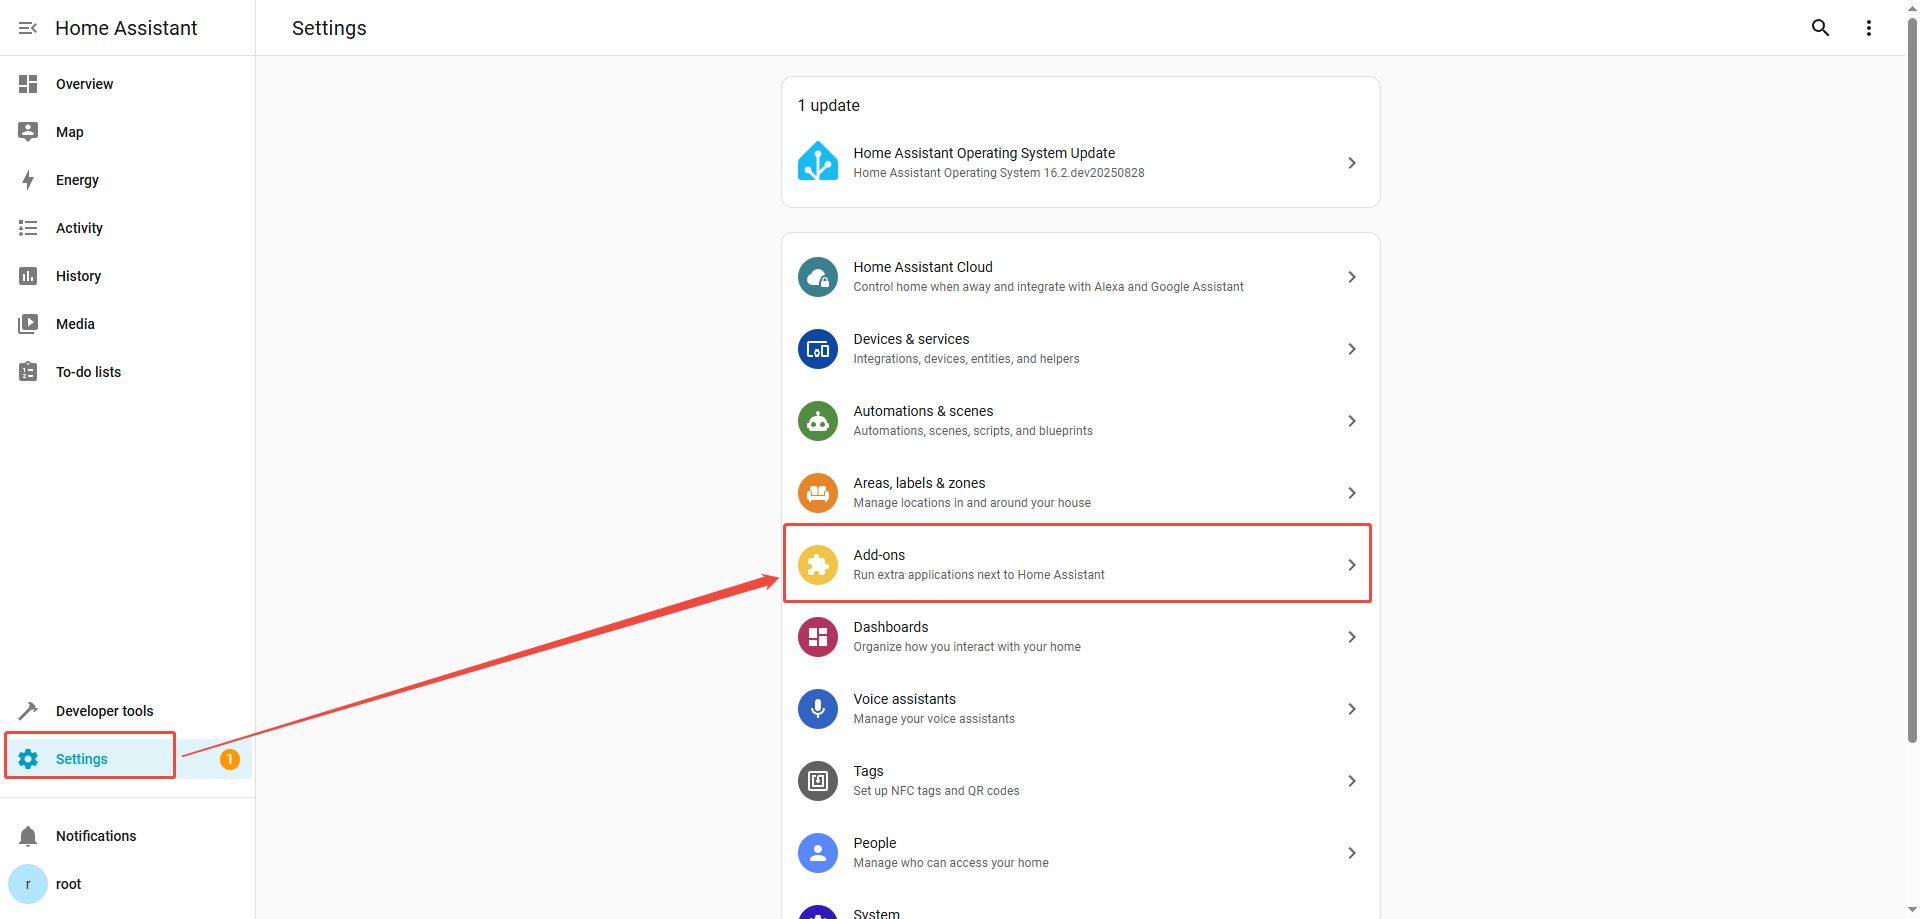
After logging into the HA interface, select "Settings" from the left navigation bar, then choose "Add-ons".
 Click the "Add-on Store" button in the lower-right corner of the page.
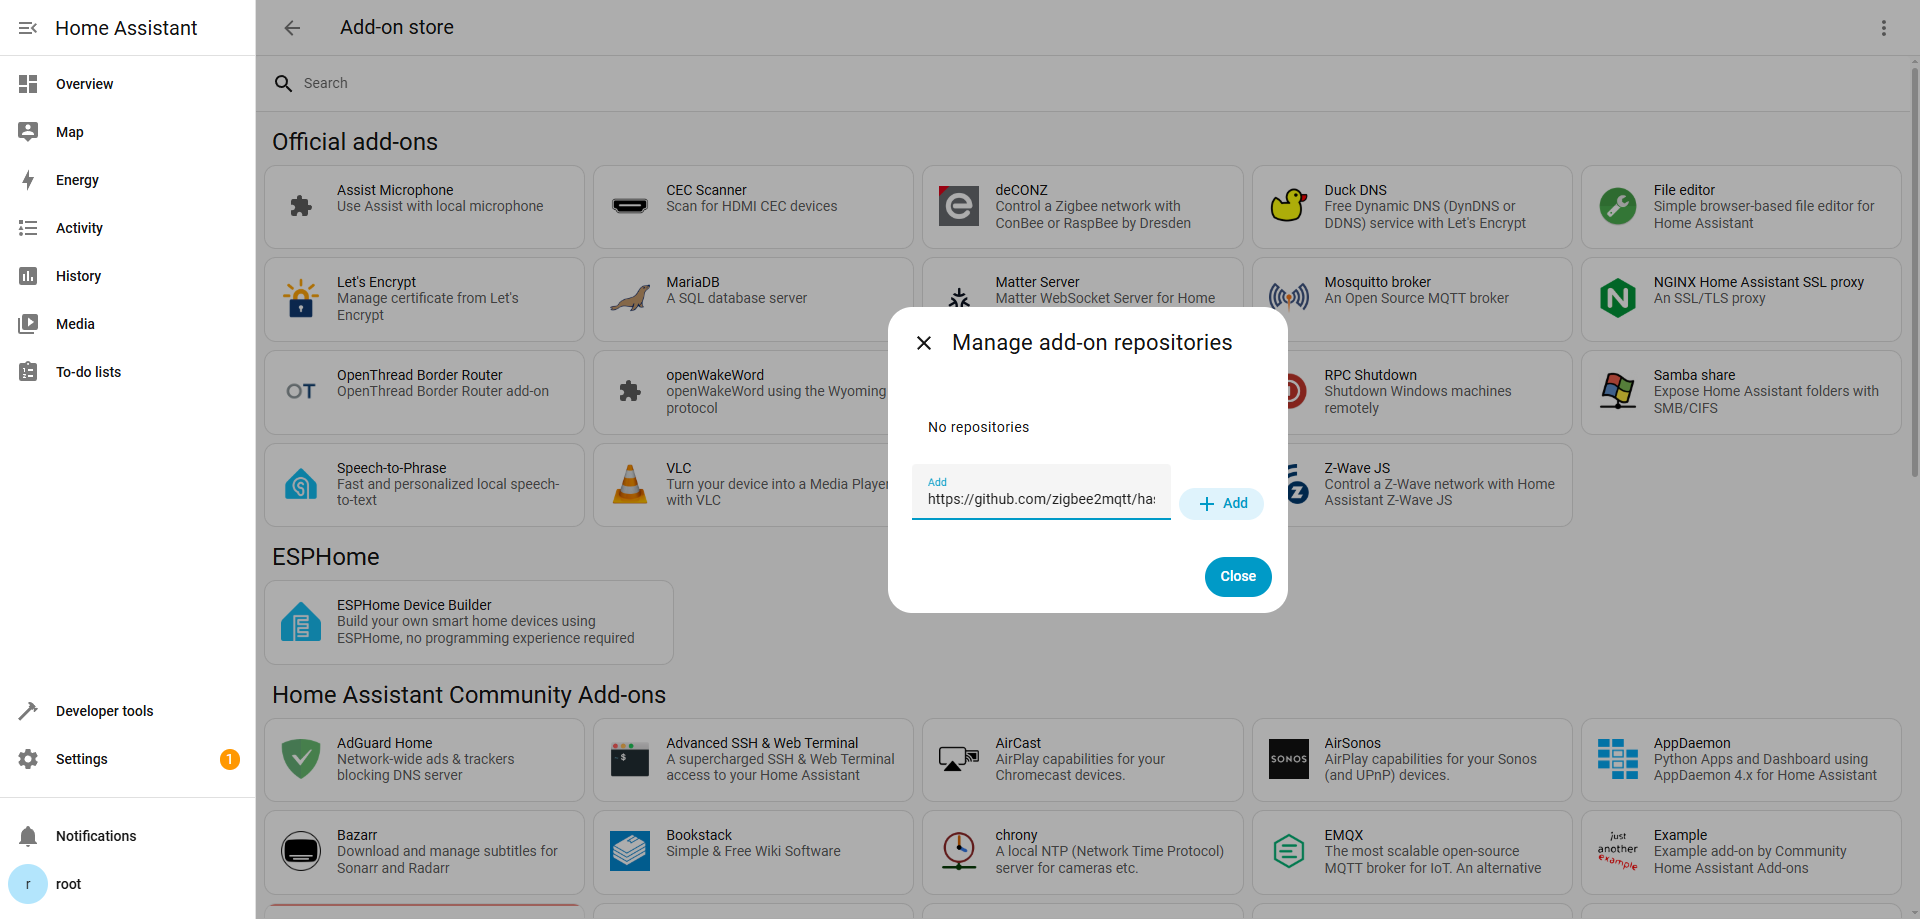
 Click the menu button in the upper-right corner of the page and select "Repositories".
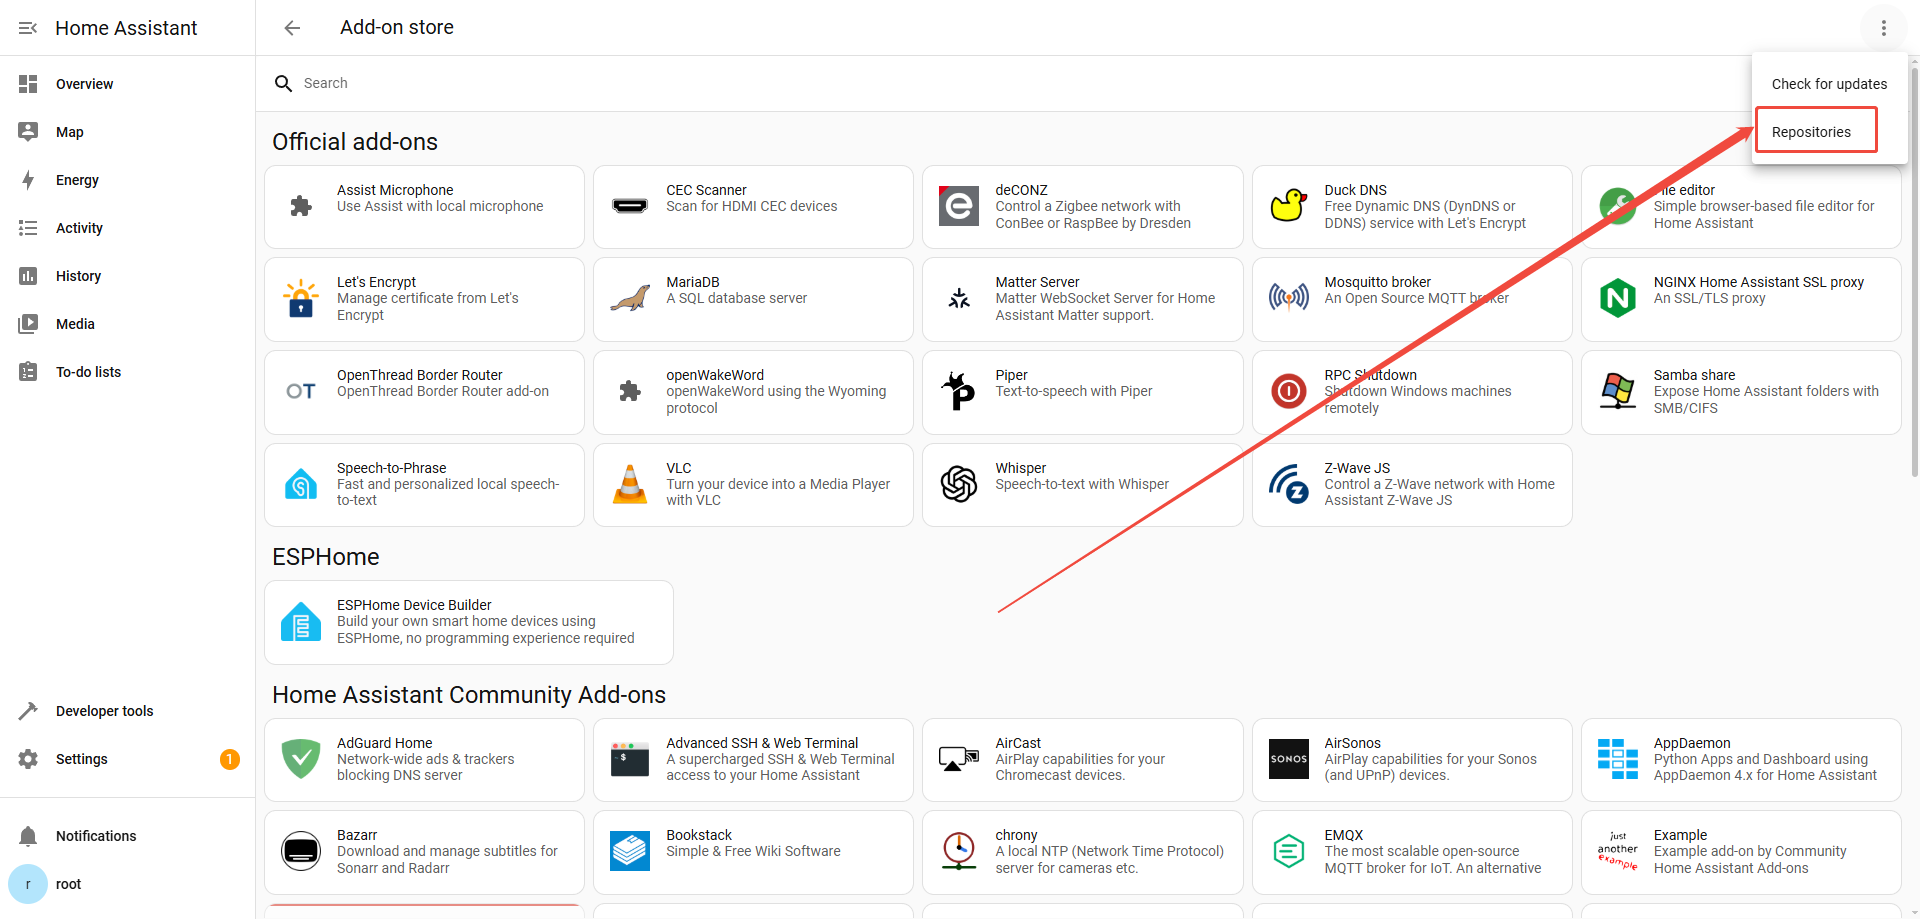 Add the repository by entering the URL https://github.com/zigbee2mqtt/hassio-zigbee2mqtt and clicking Add, then close the window.
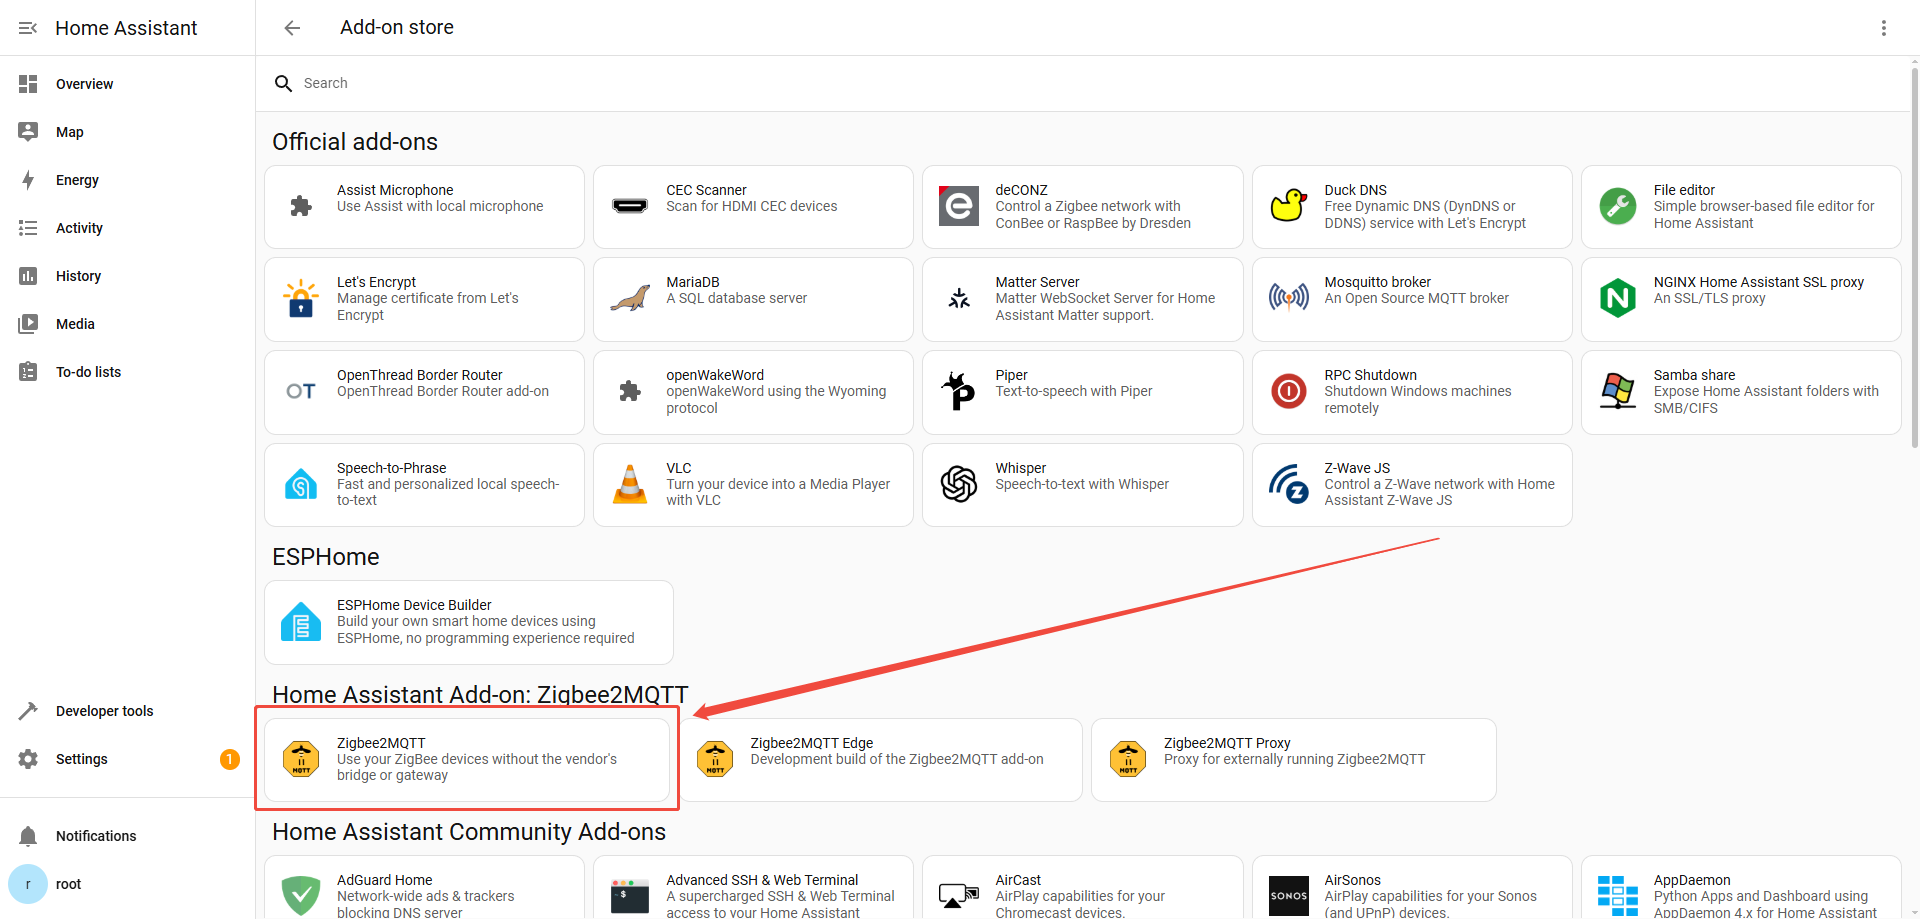
- Add Zigbee2MQTT
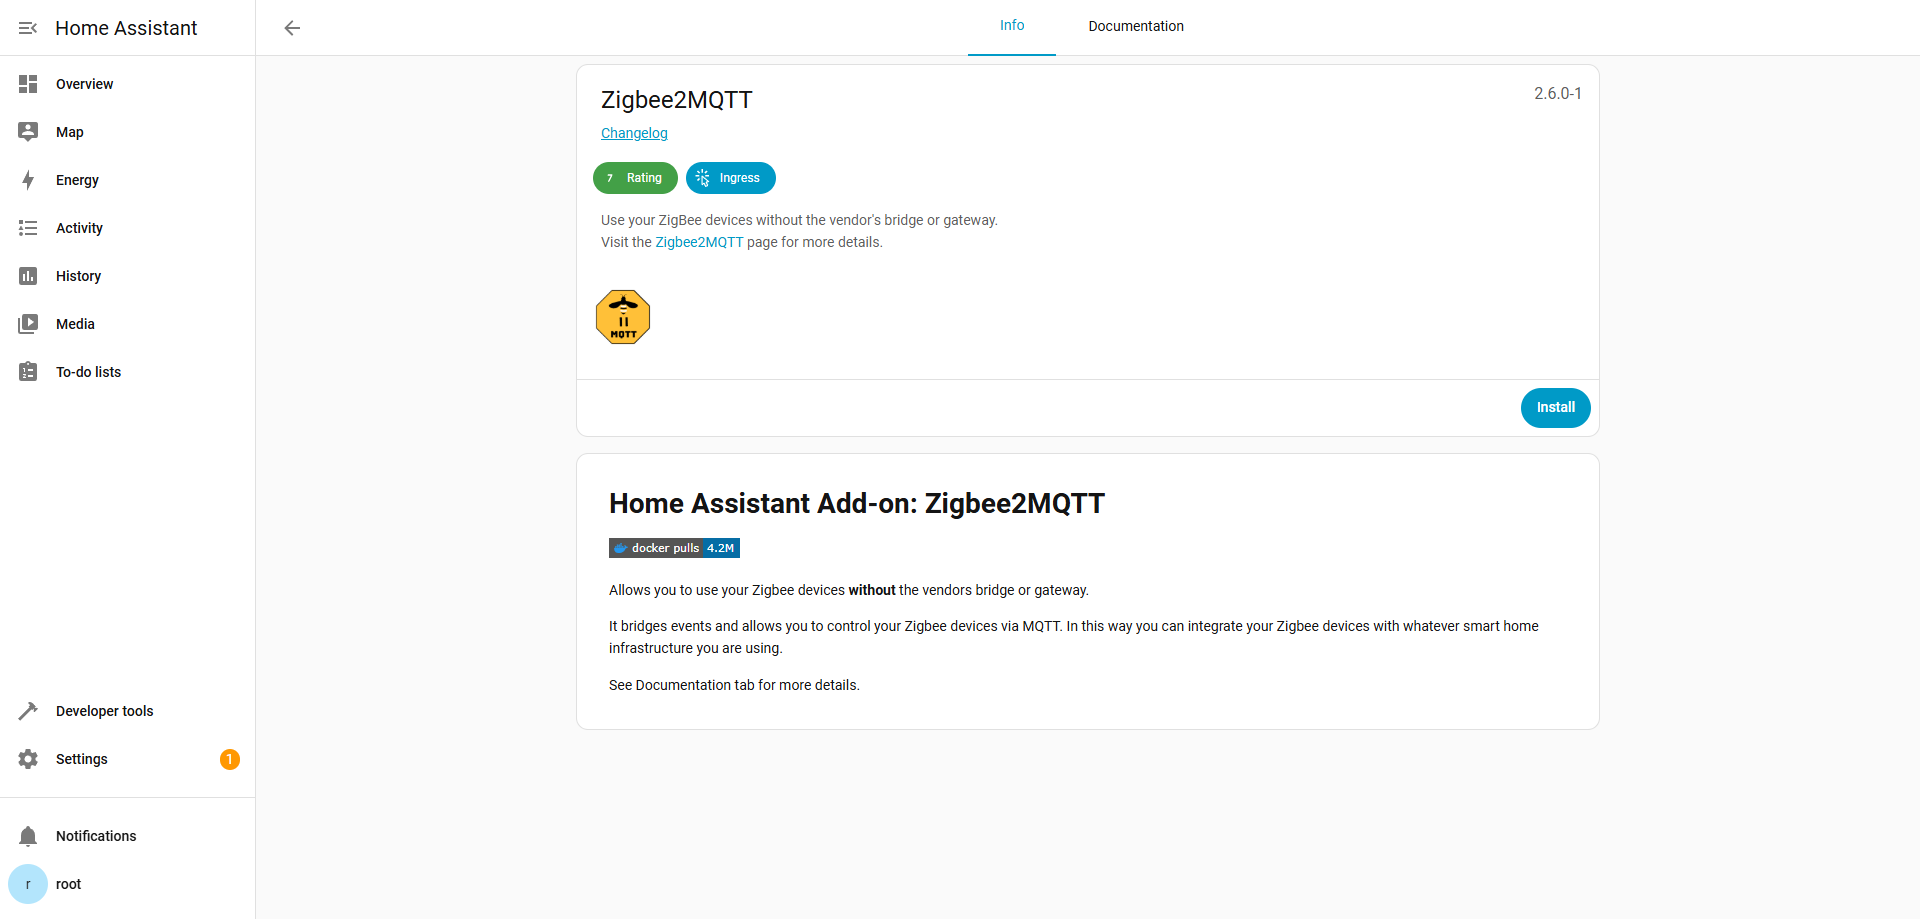
- Install Zigbee2MQTT
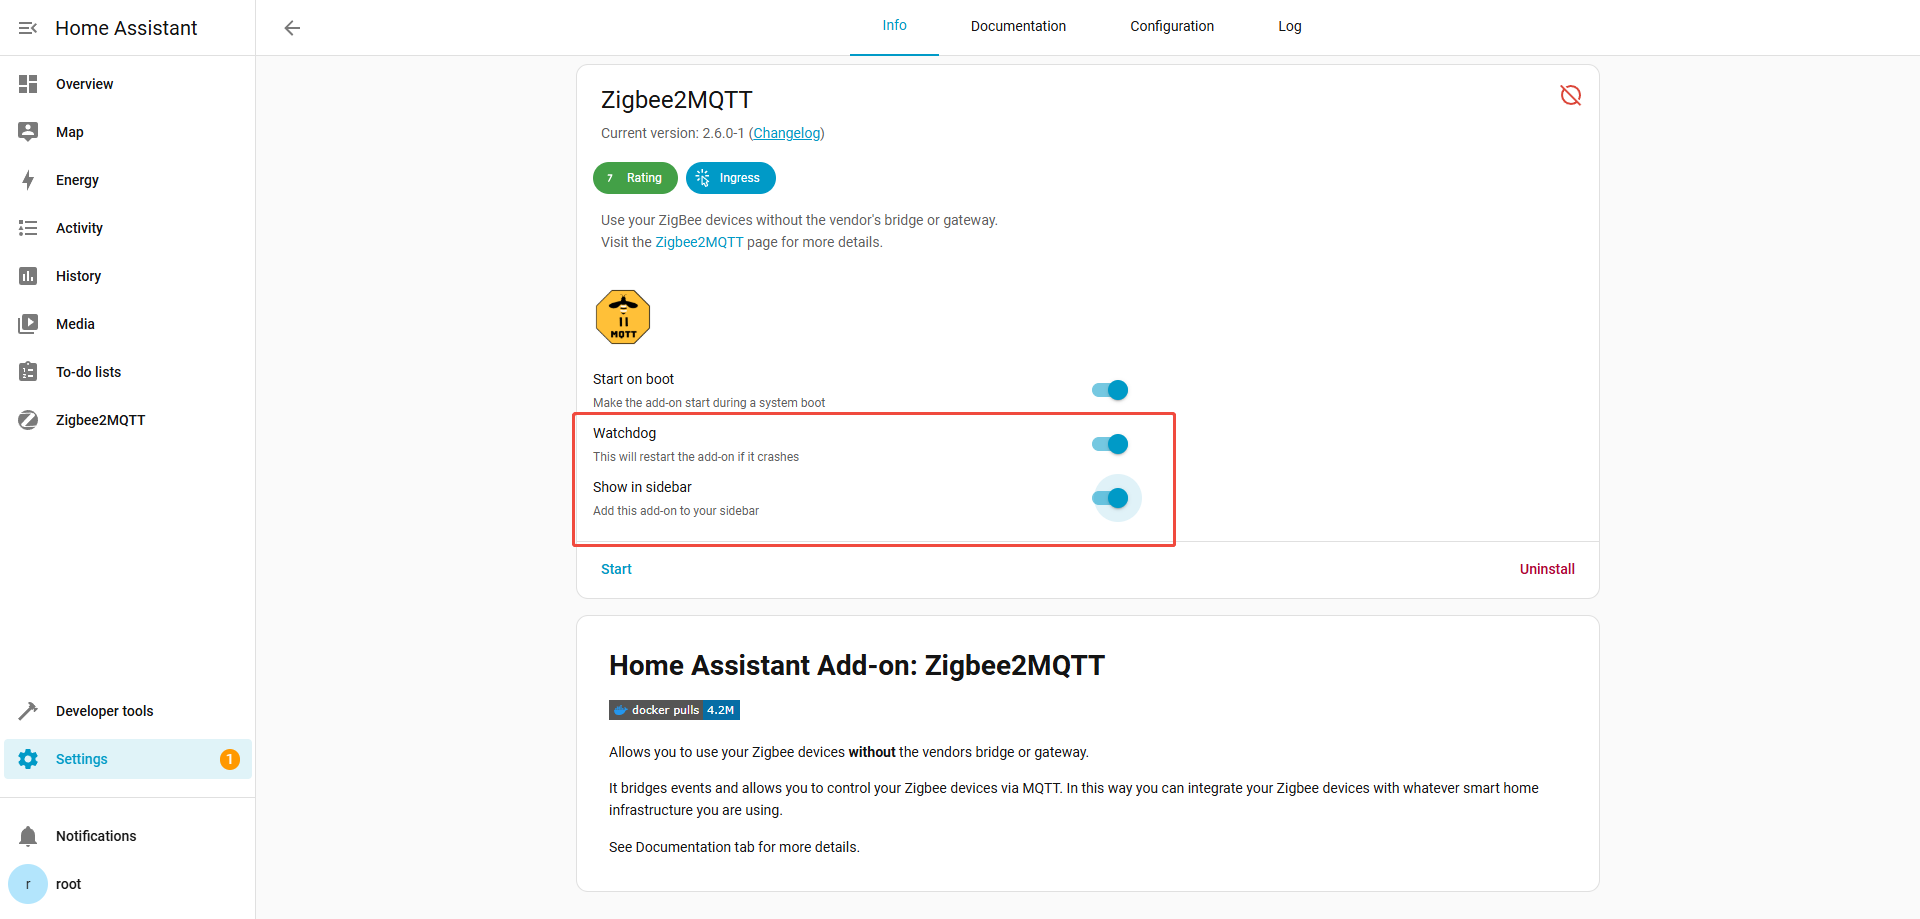
 Turn on Watchdog and Show in Sidebar, then click Start.
3.2.2 Configuration
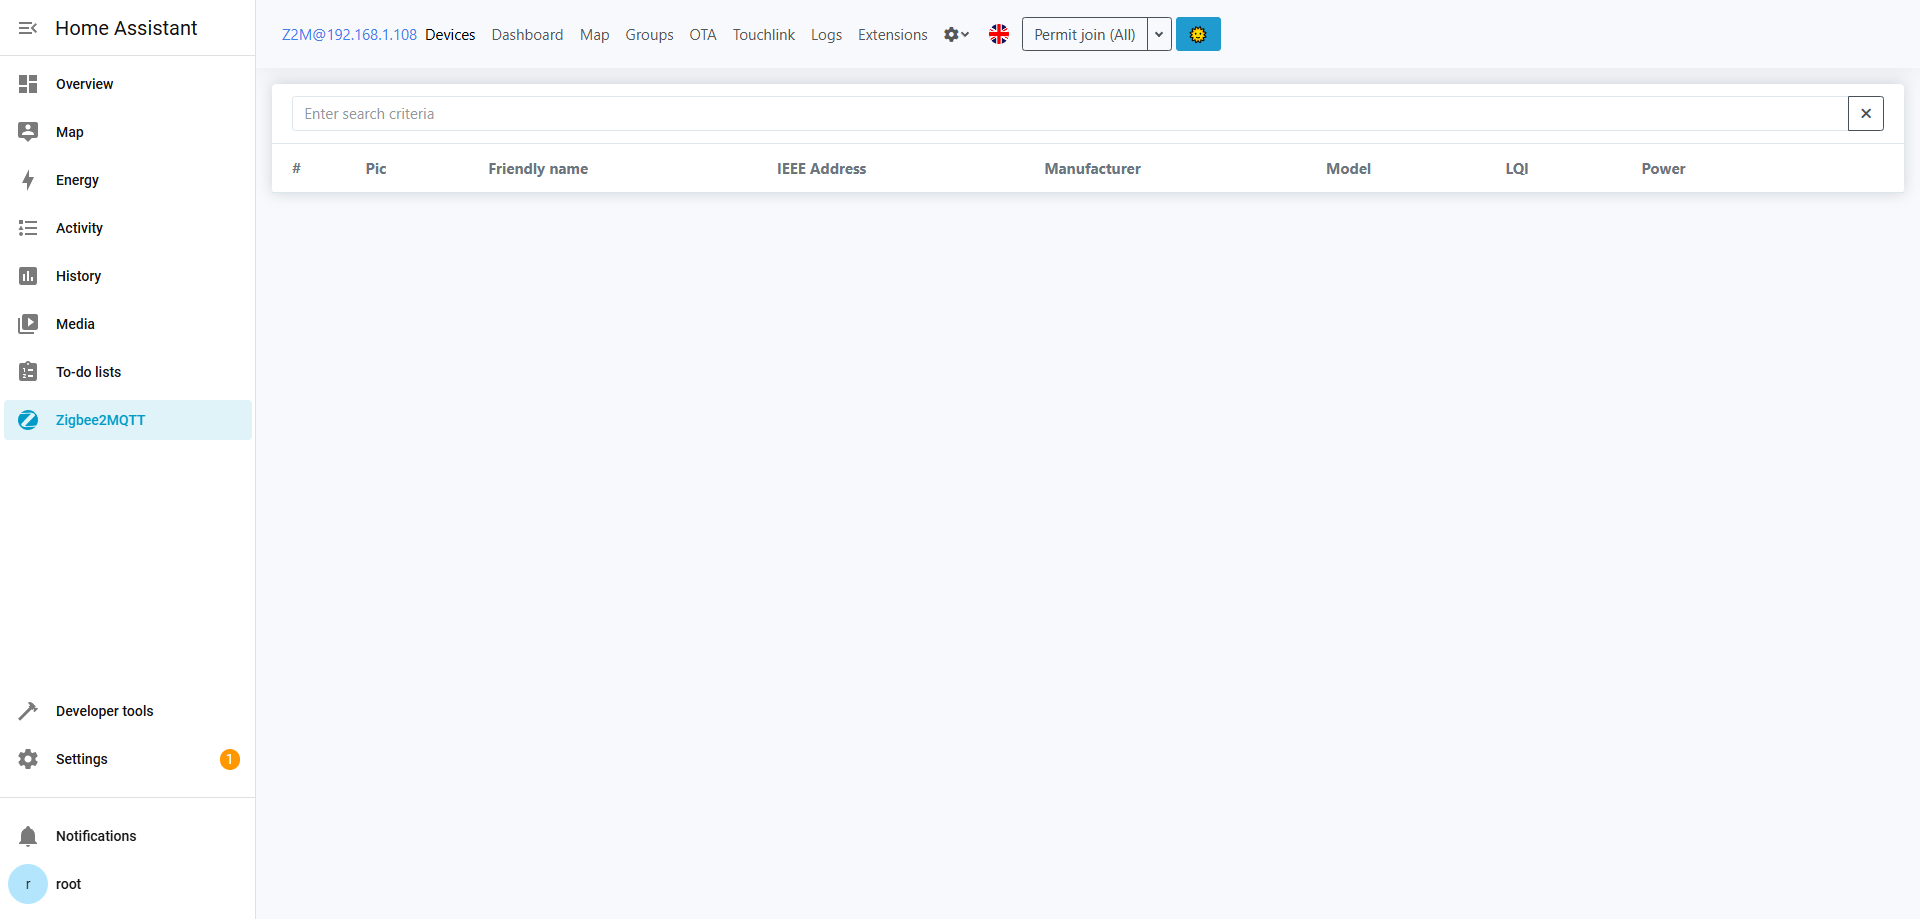
Click Zigbee2MQTT in the left navigation bar to start Zigbee configuration.
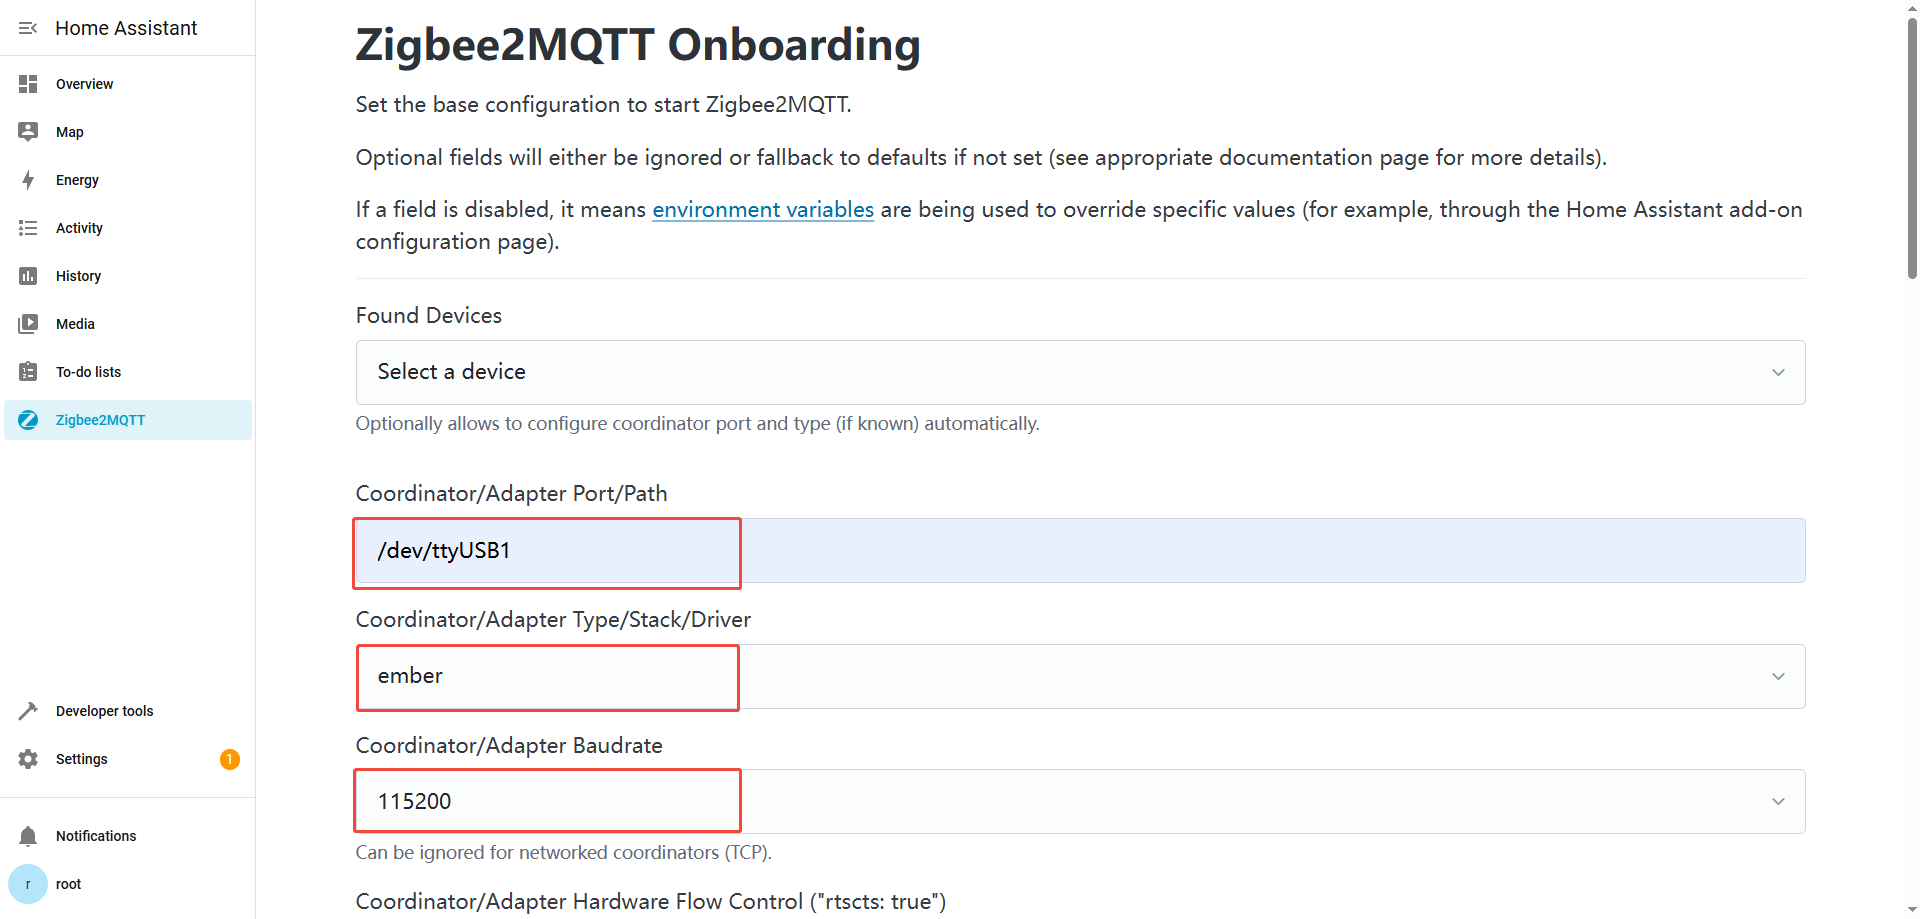
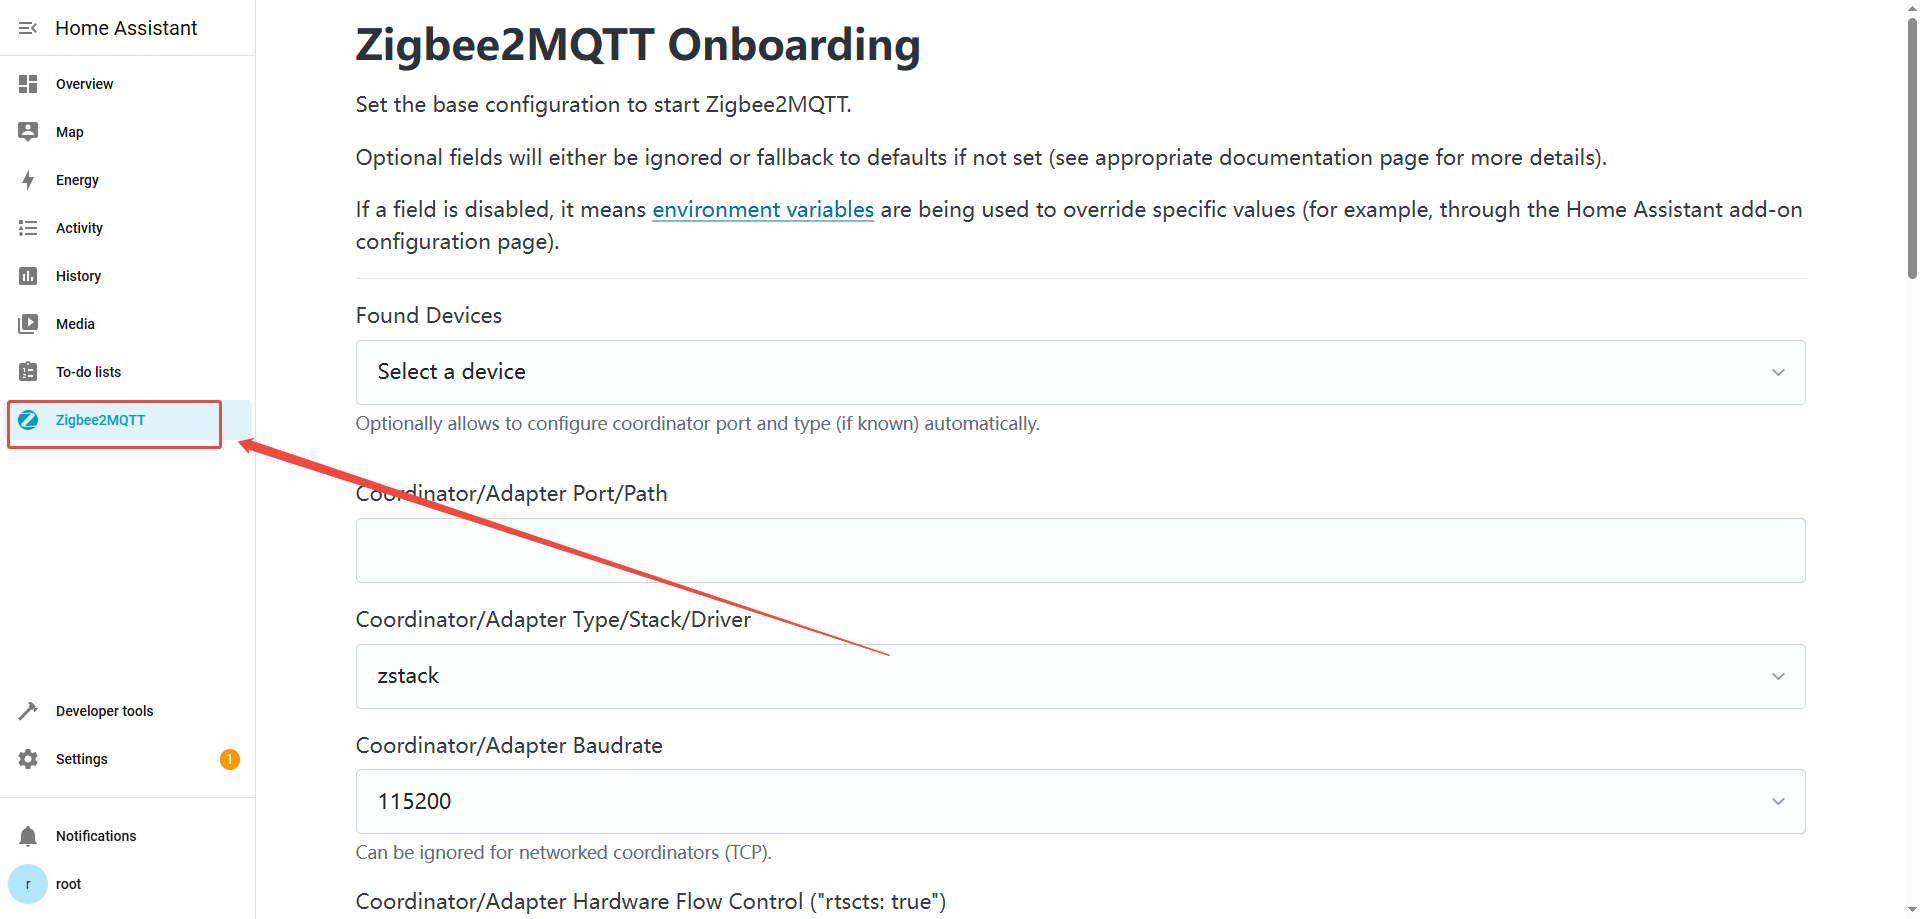 Enter /dev/ttyUSB1 in the Port/Path field, select ember for Type/Stack/Driver, and choose 115200 for Baudrate.
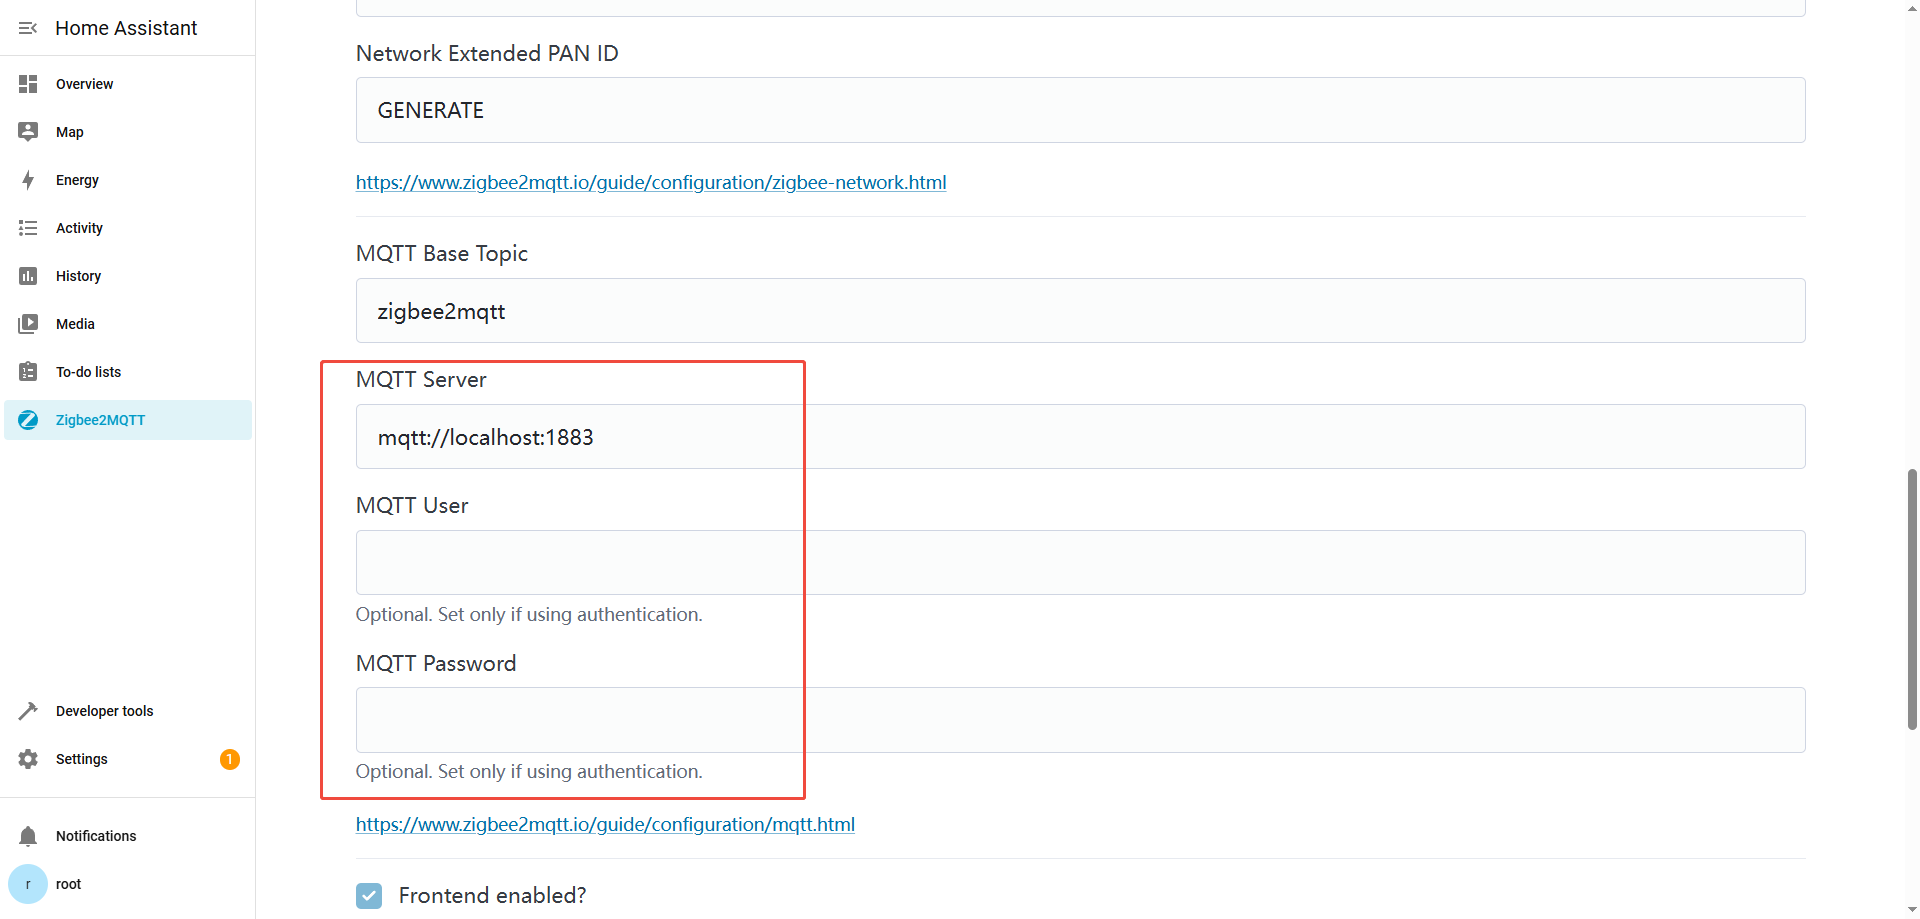
 Replace the default mqtt://localhost:1883 with your server address (e.g., mqtt://192.168.1.100:1883). If authentication is required, provide the MQTT User and Password.
 Click Submit
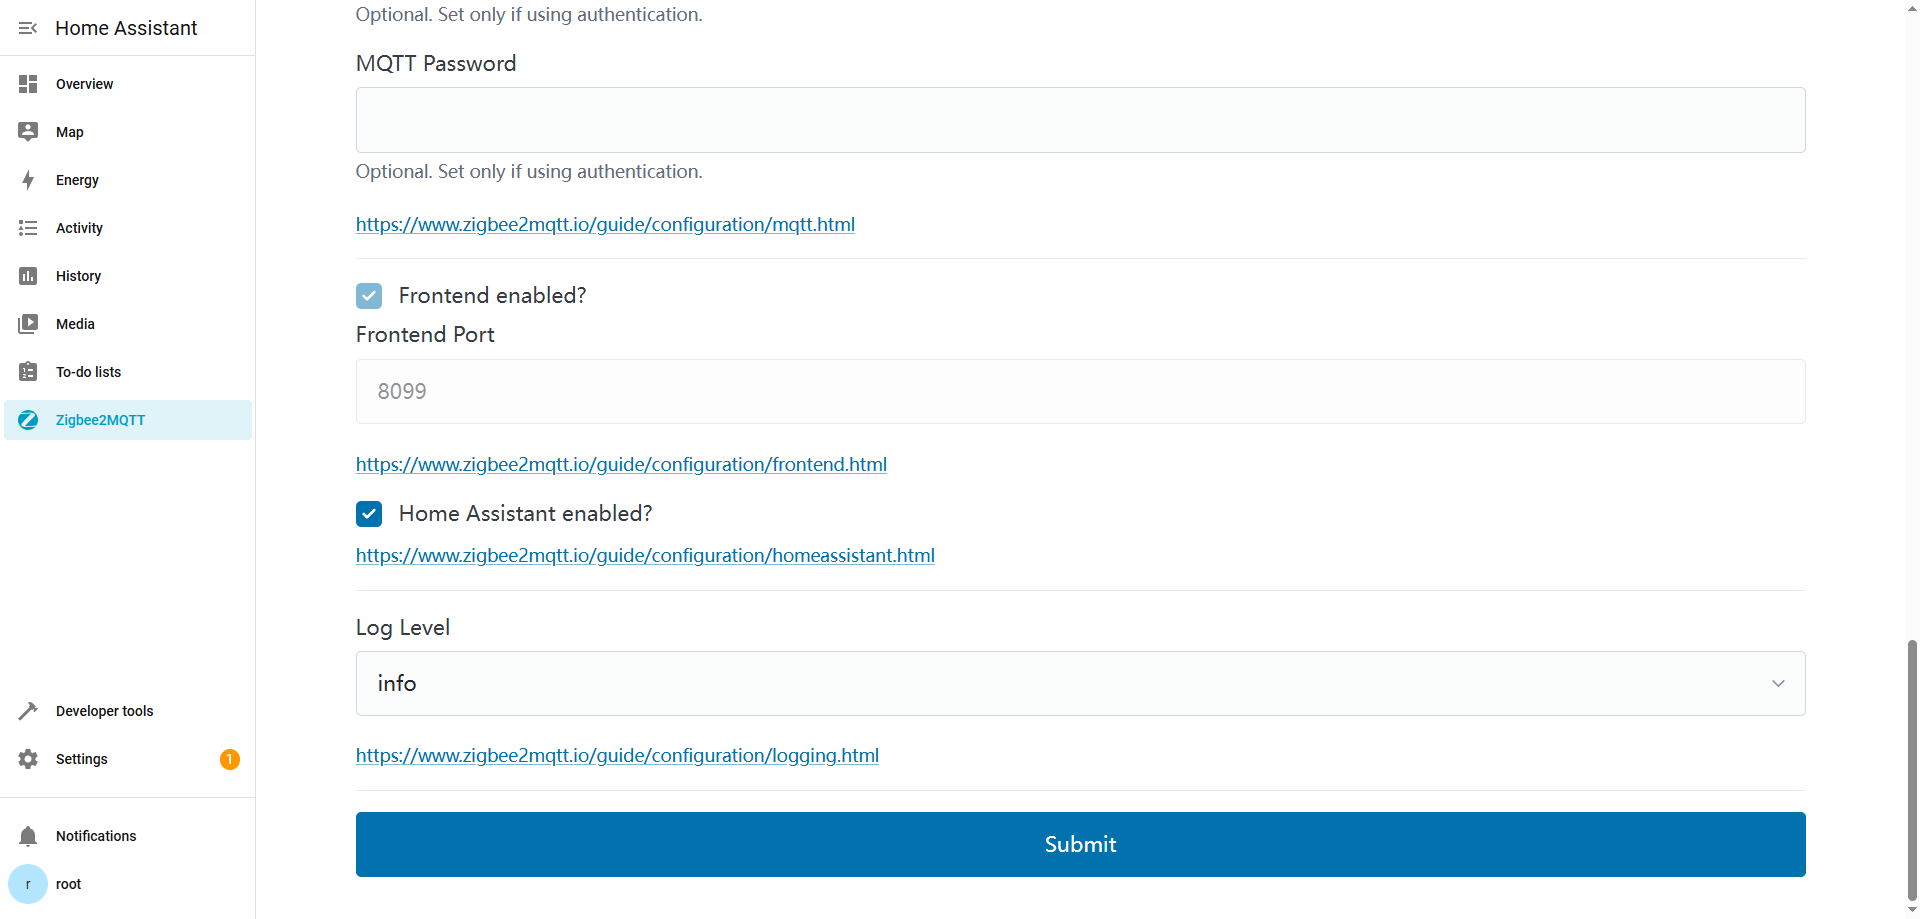 Zigbee2MQTT configured successfully.
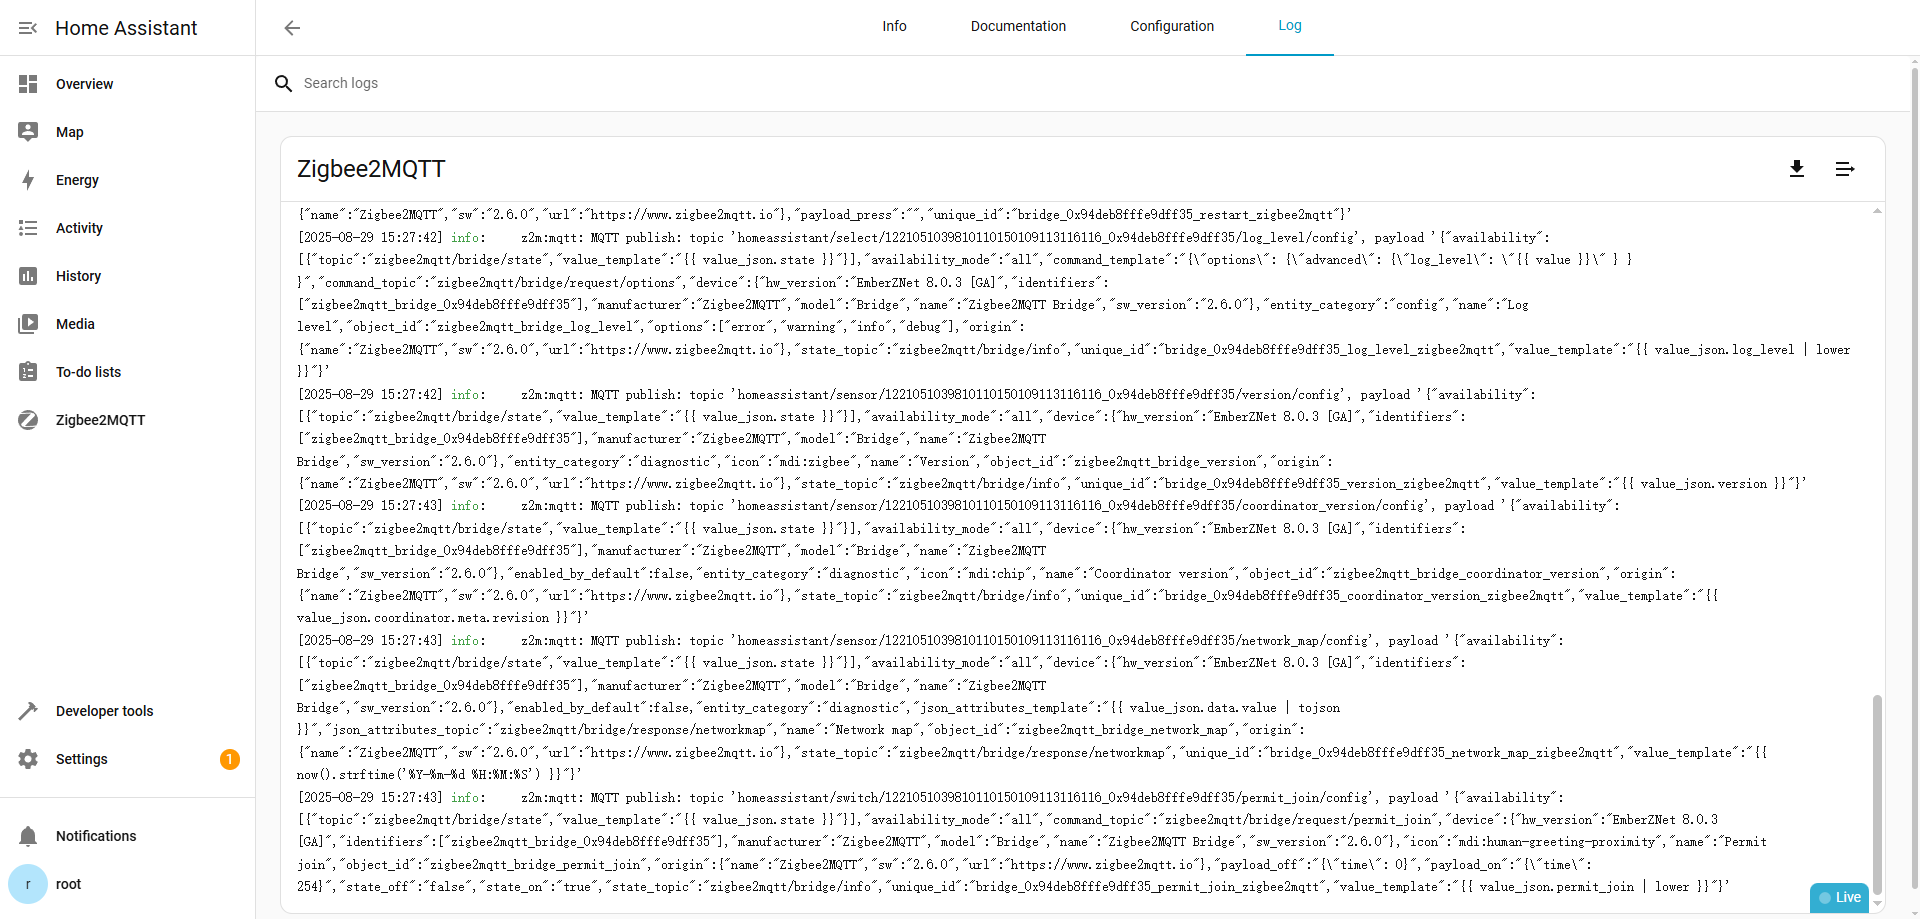
3.2.3 log
If any errors occur, you can view the log information by going to Settings → Add-ons → Zigbee2MQTT → Log.
3.3 Z-Wave Configure
3.3.1 Install Add-on
After logging into the HA interface, select "Settings" from the left navigation bar, then choose "Add-ons".
 Click the "Add-on Store" button in the lower-right corner of the page.
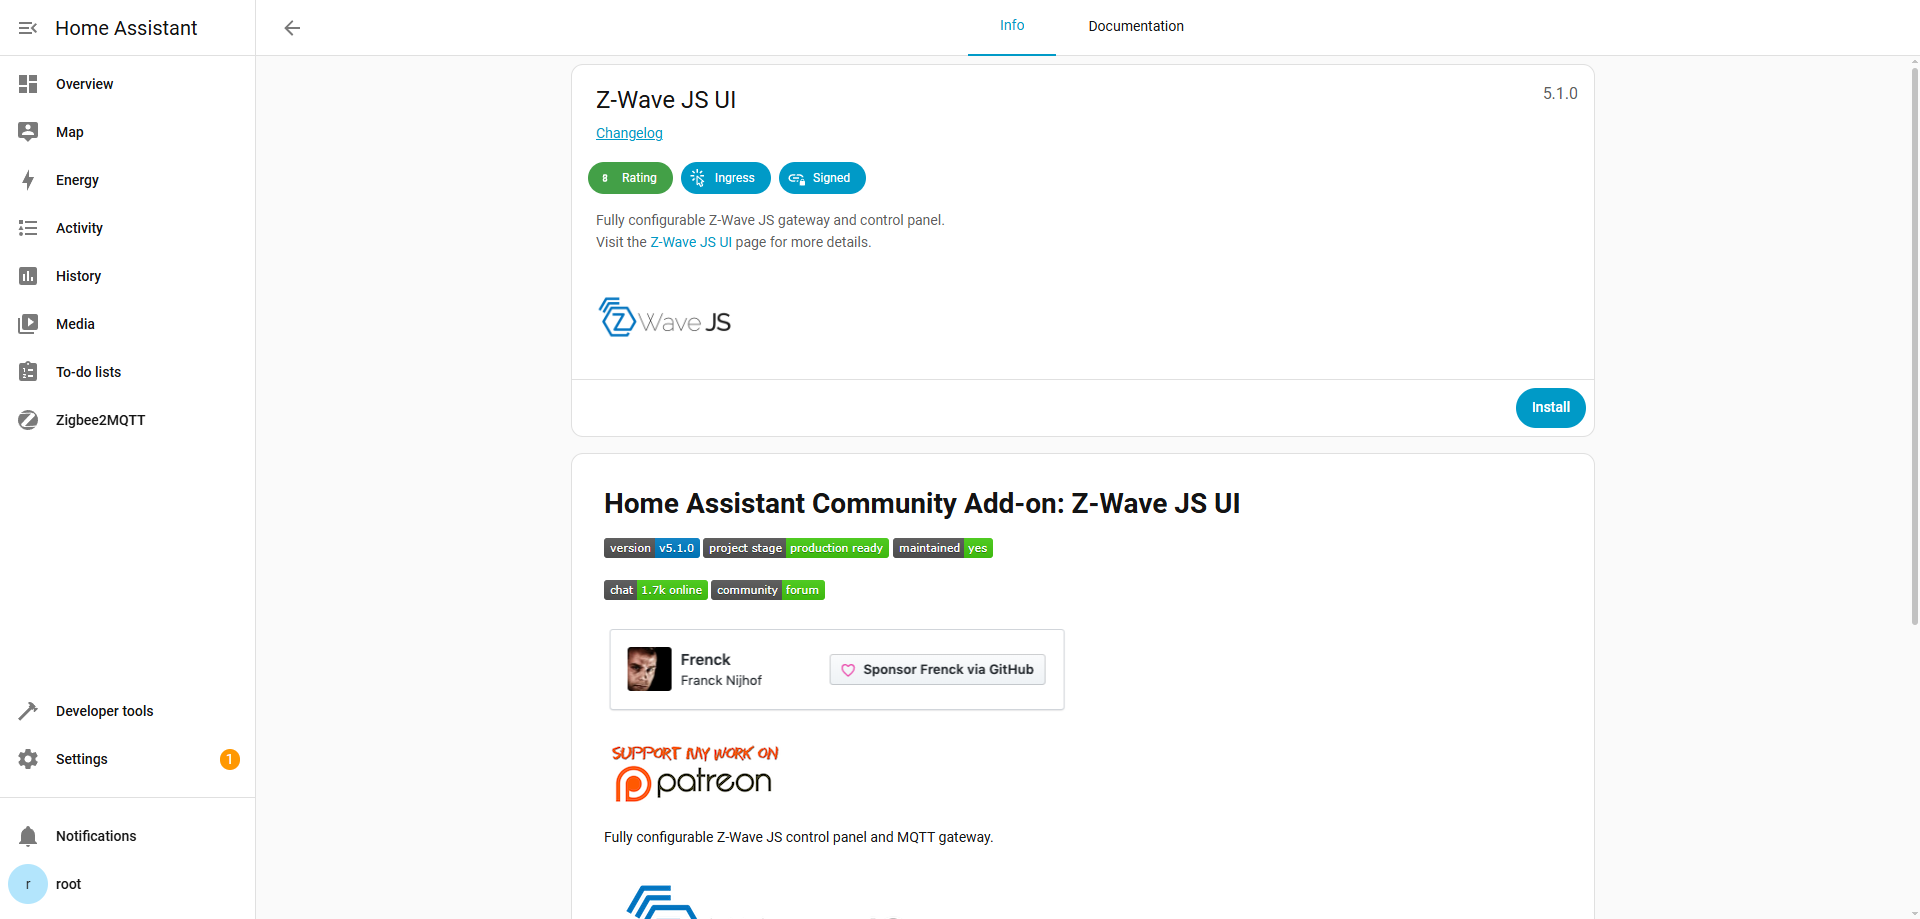
 Click Z-Wave JS UI
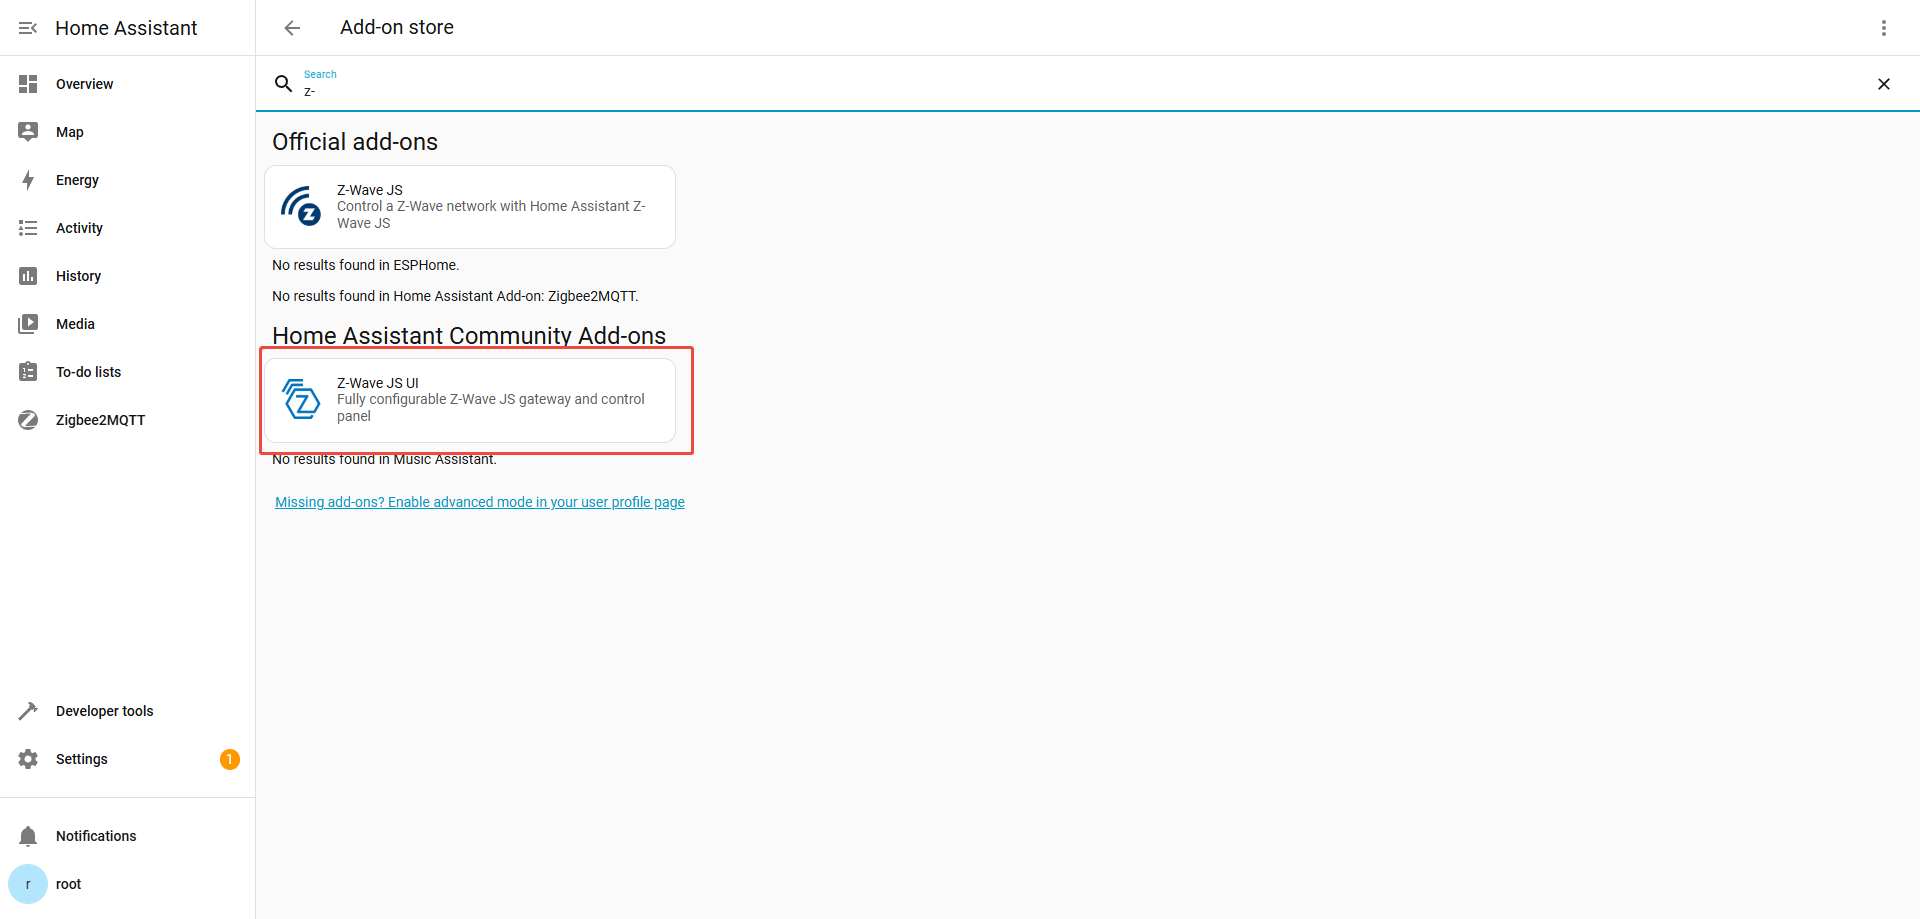 Install Z-Wave JS UI
 Turn on Watchdog and Show in Sidebar, then click Start.

3.3.2 Configuration
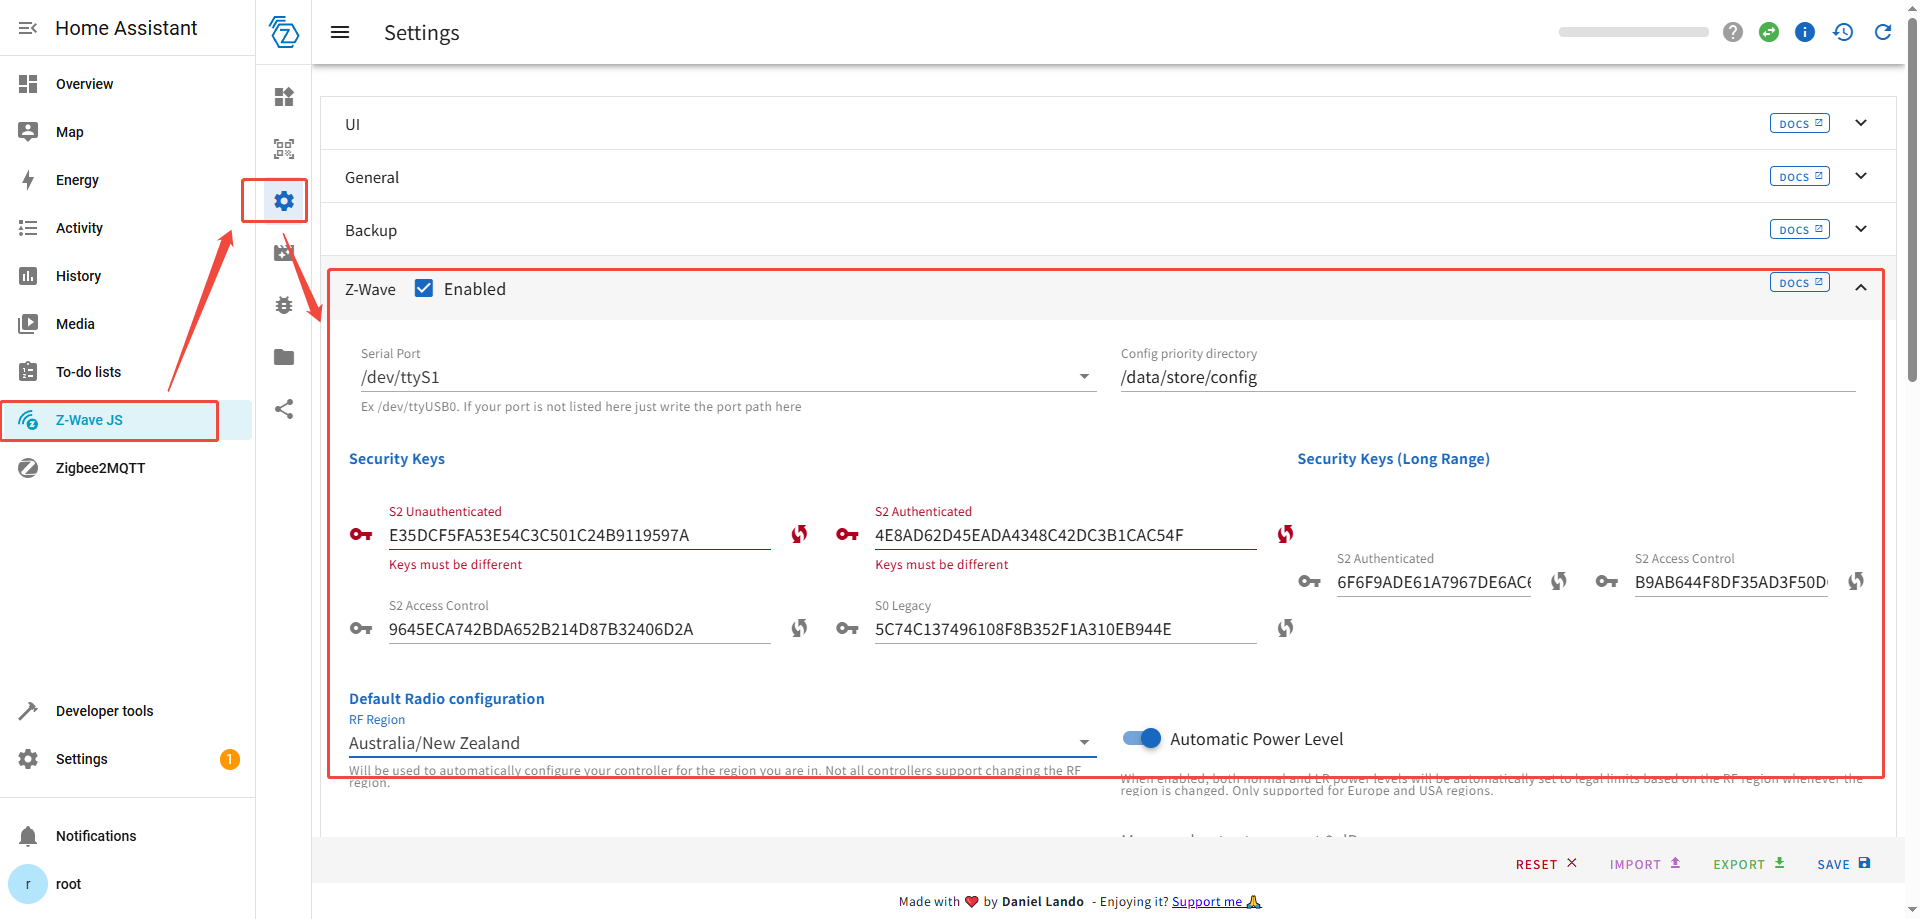
Click Z-Wave JS in the left navigation bar to start Zigbee configuration.
Serial Port:/dev/ttyS1
RF Region:Select the appropriate frequency band for Z-Wave.
3.3.3.Log
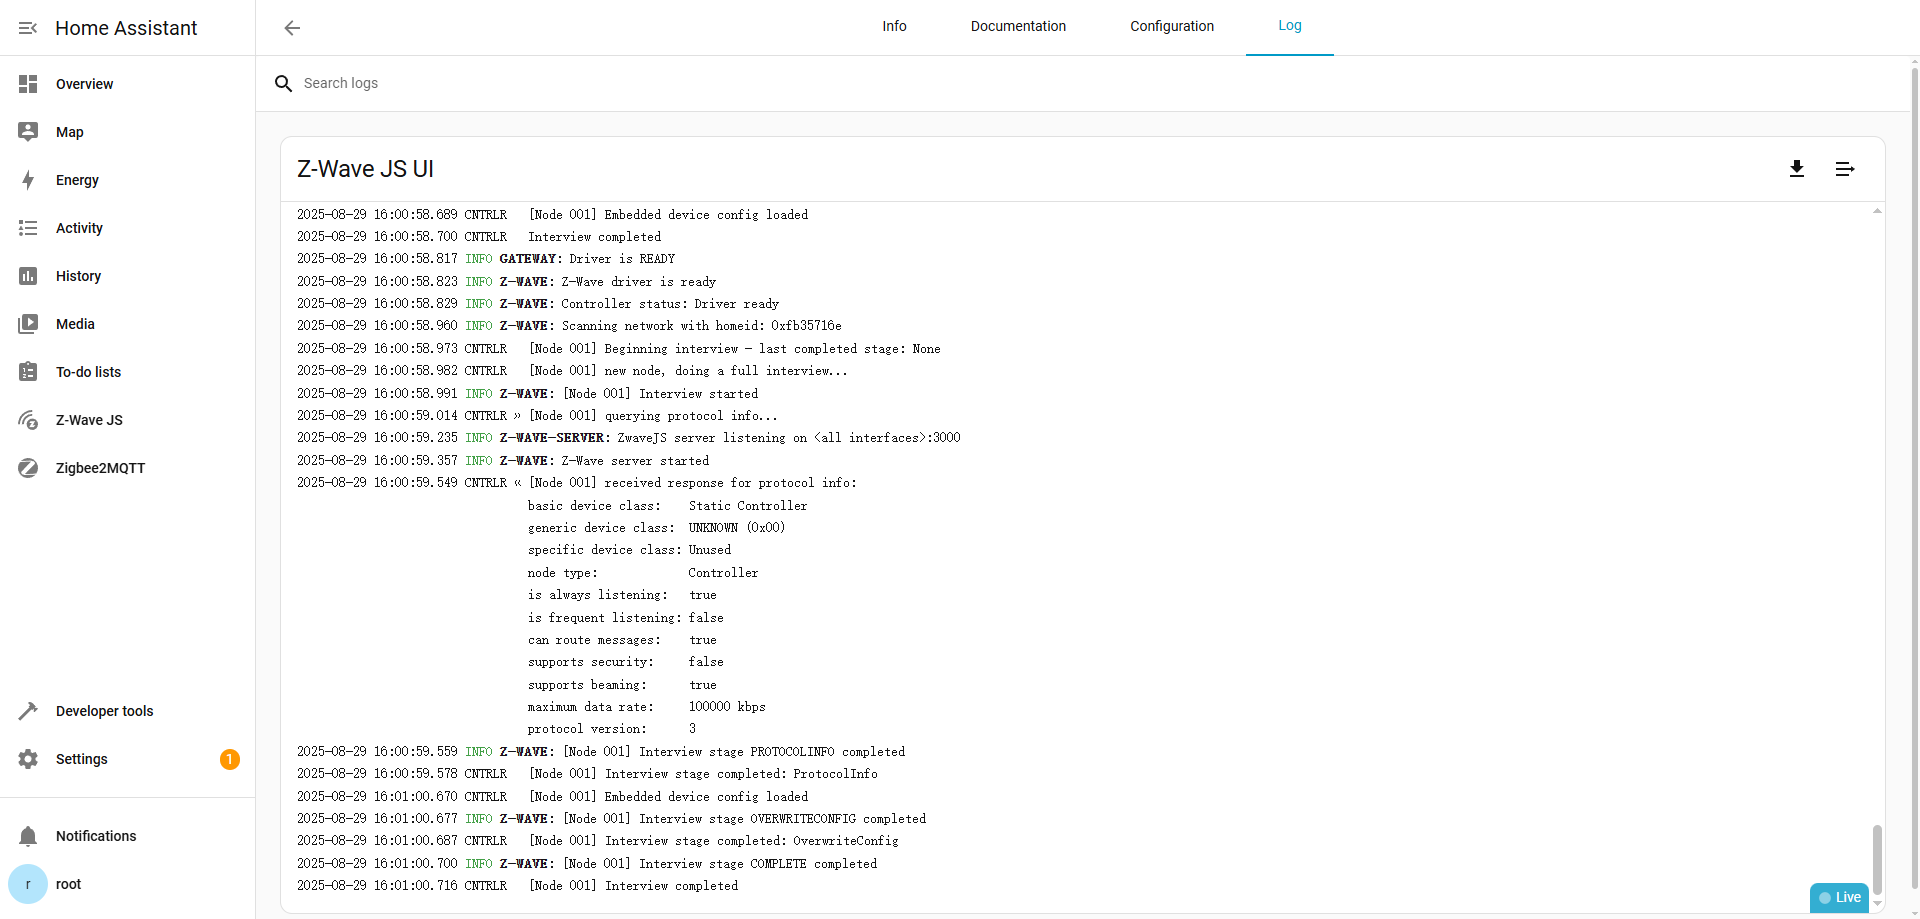
If any errors occur, you can view the log information by going to Settings → Add-ons → Z-Wave JS UI → Log.
3.4 Add Bluetooth
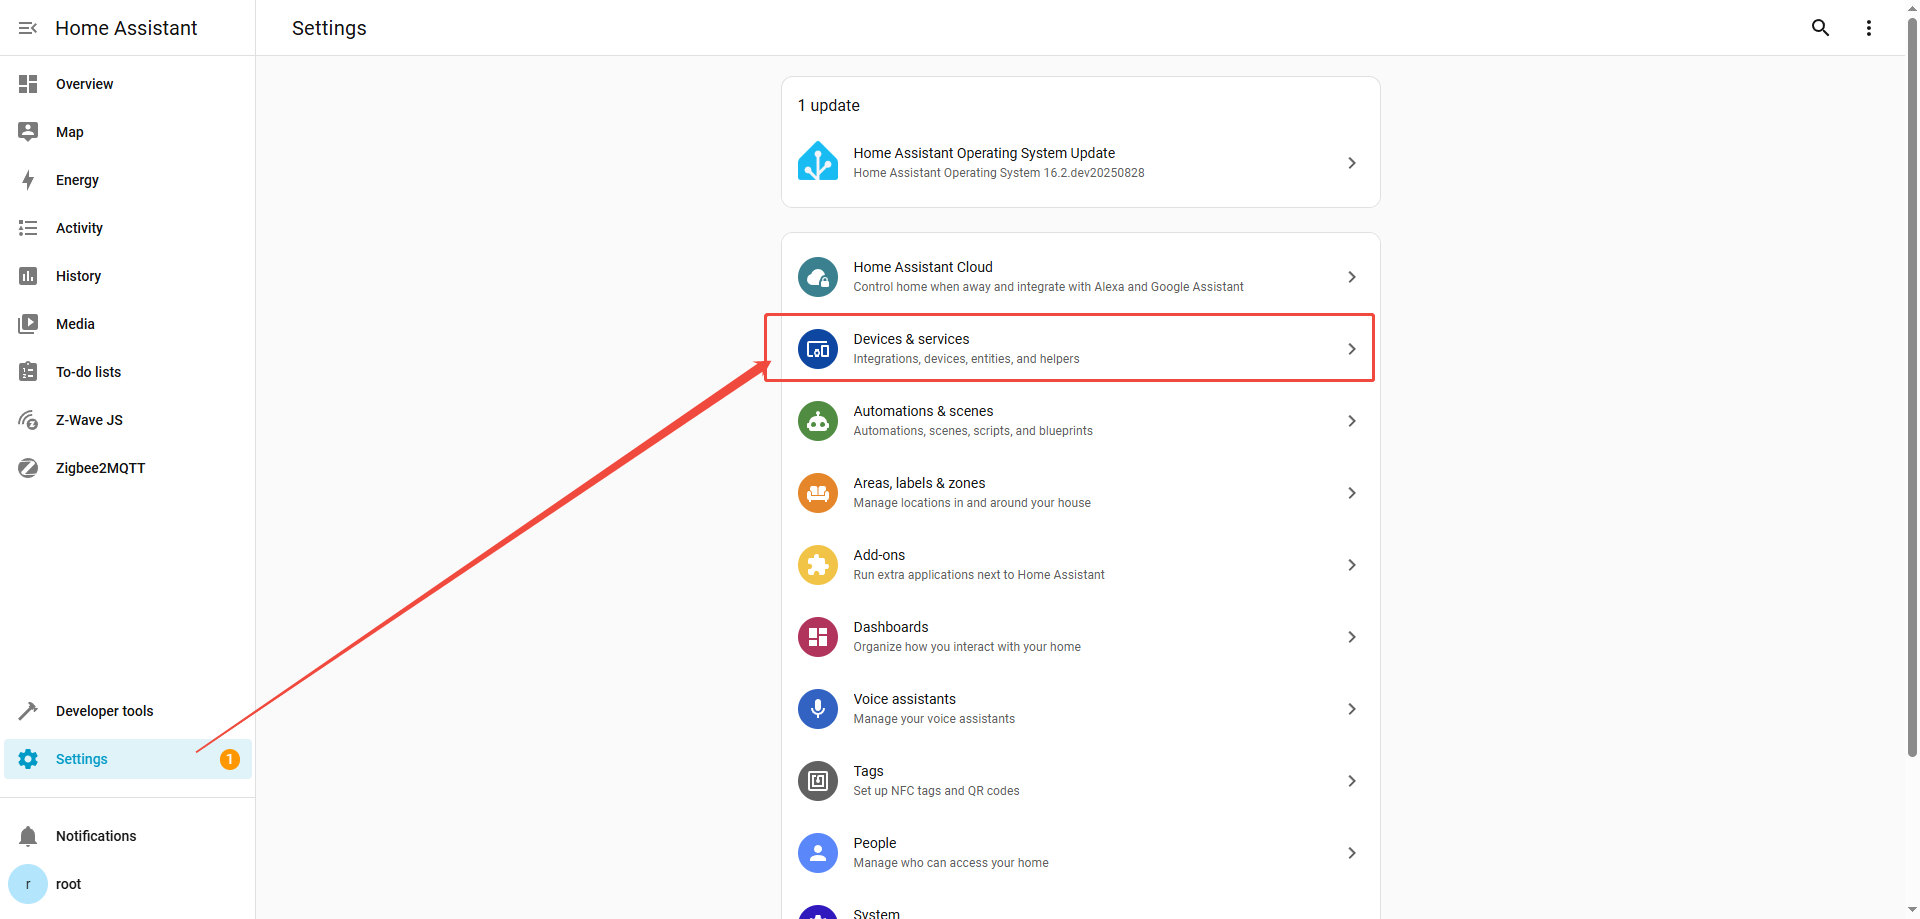
After logging into the HA interface, select "Settings" from the left navigation bar, then choose "Devices & services".
 Click the "Add integration" button in the lower-right corner of the page.
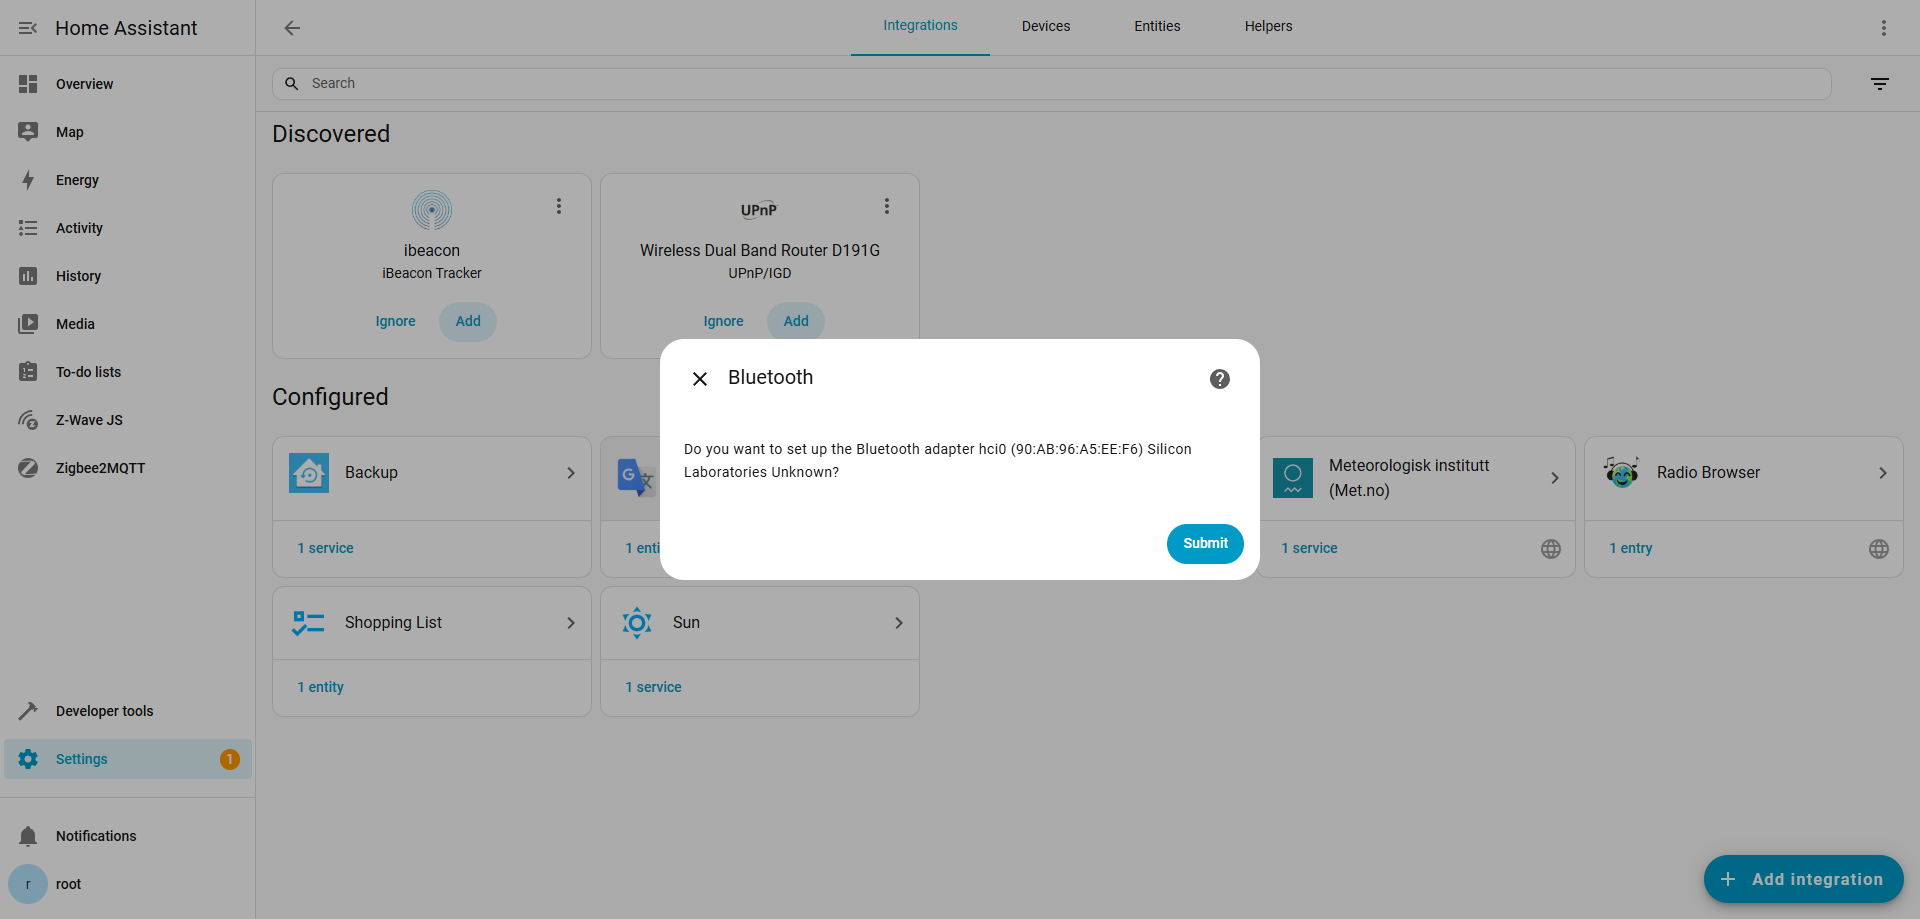
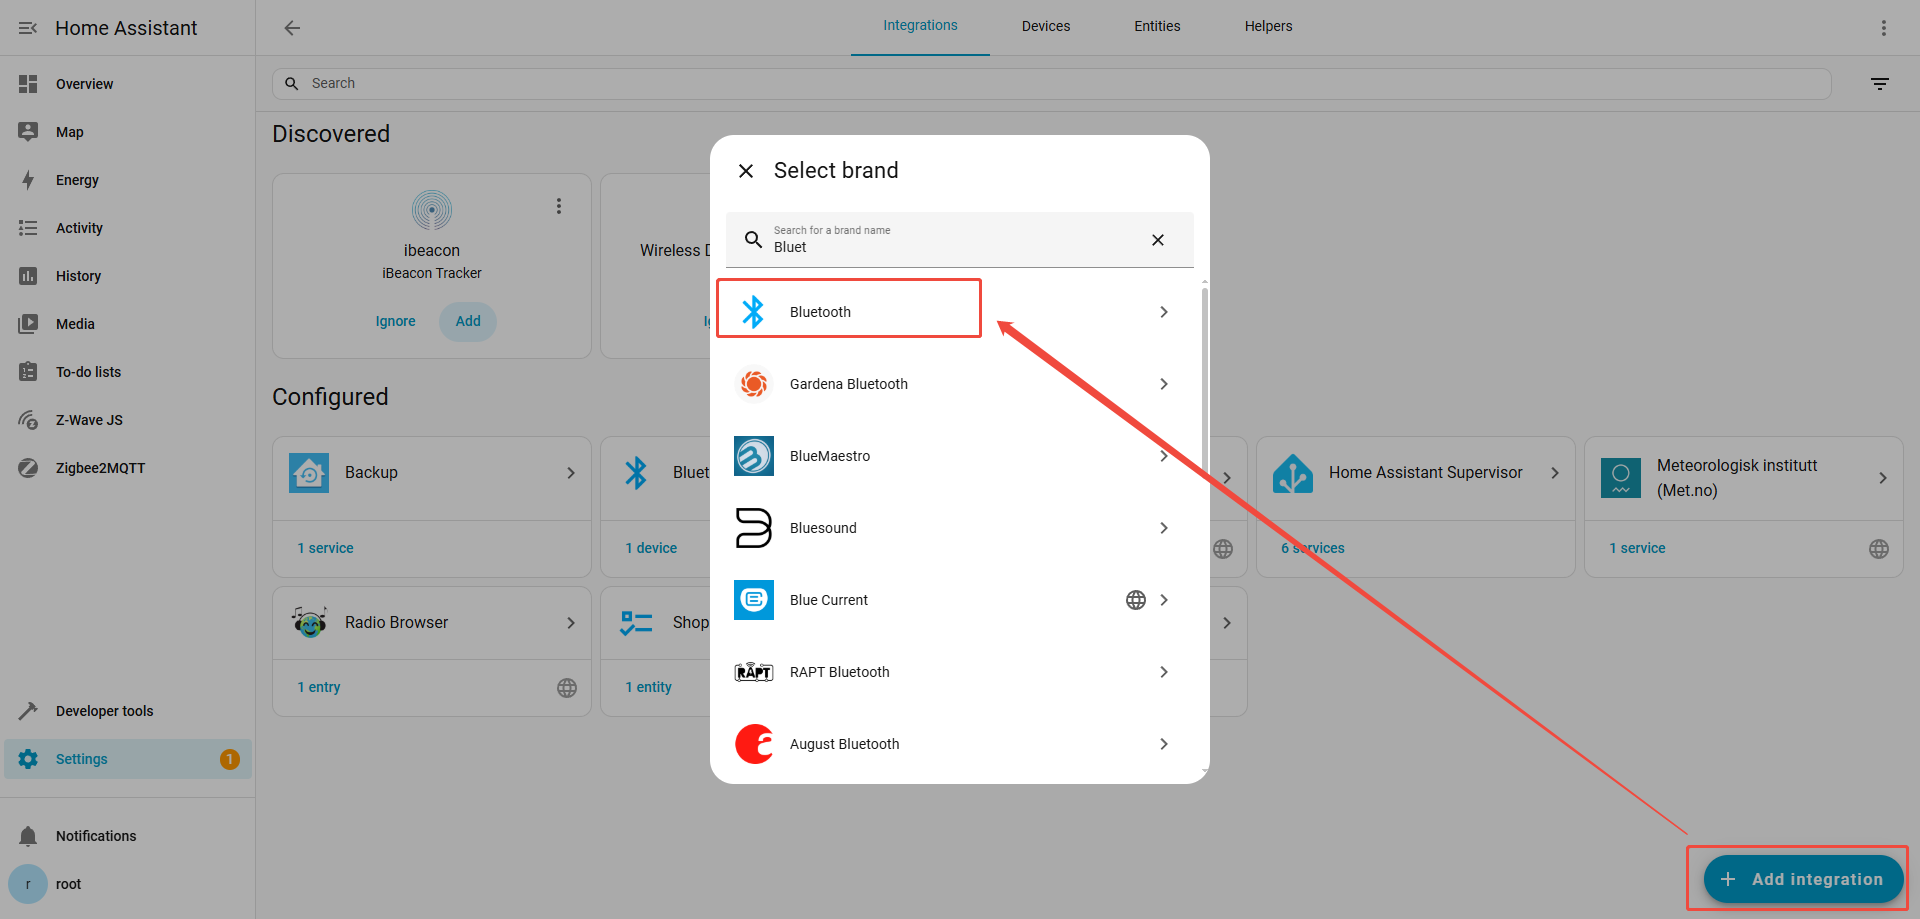 Click Submit
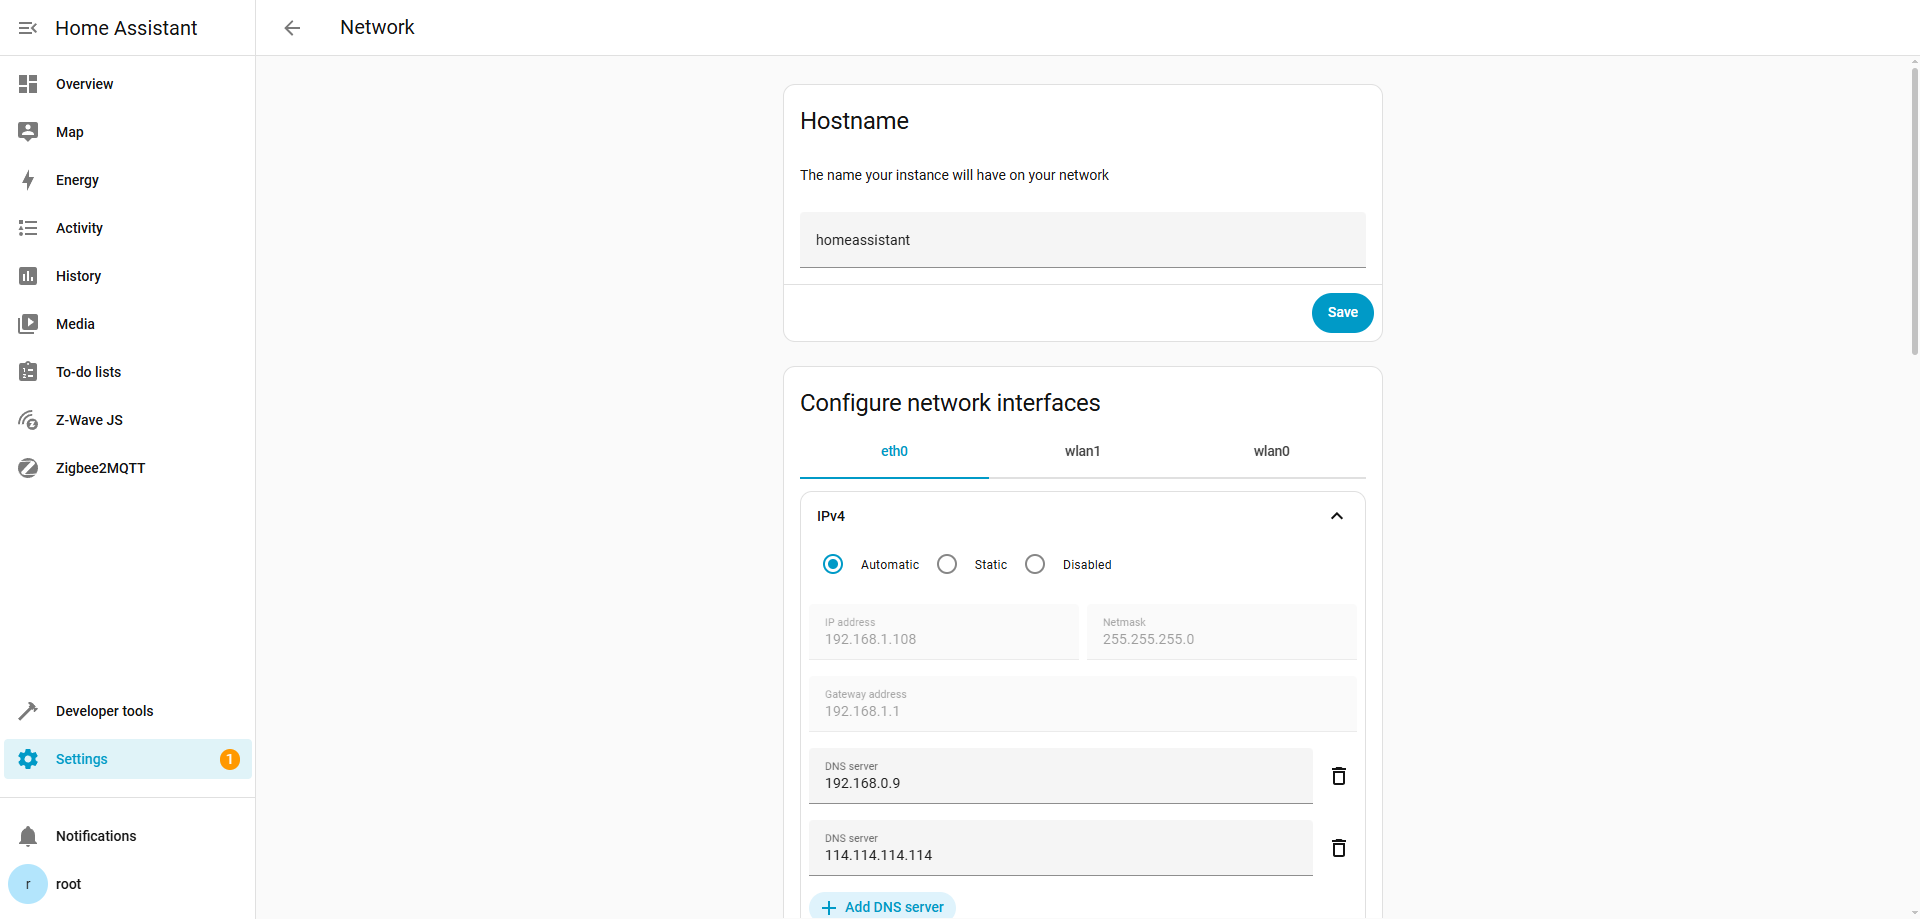
3.5 Network Configure
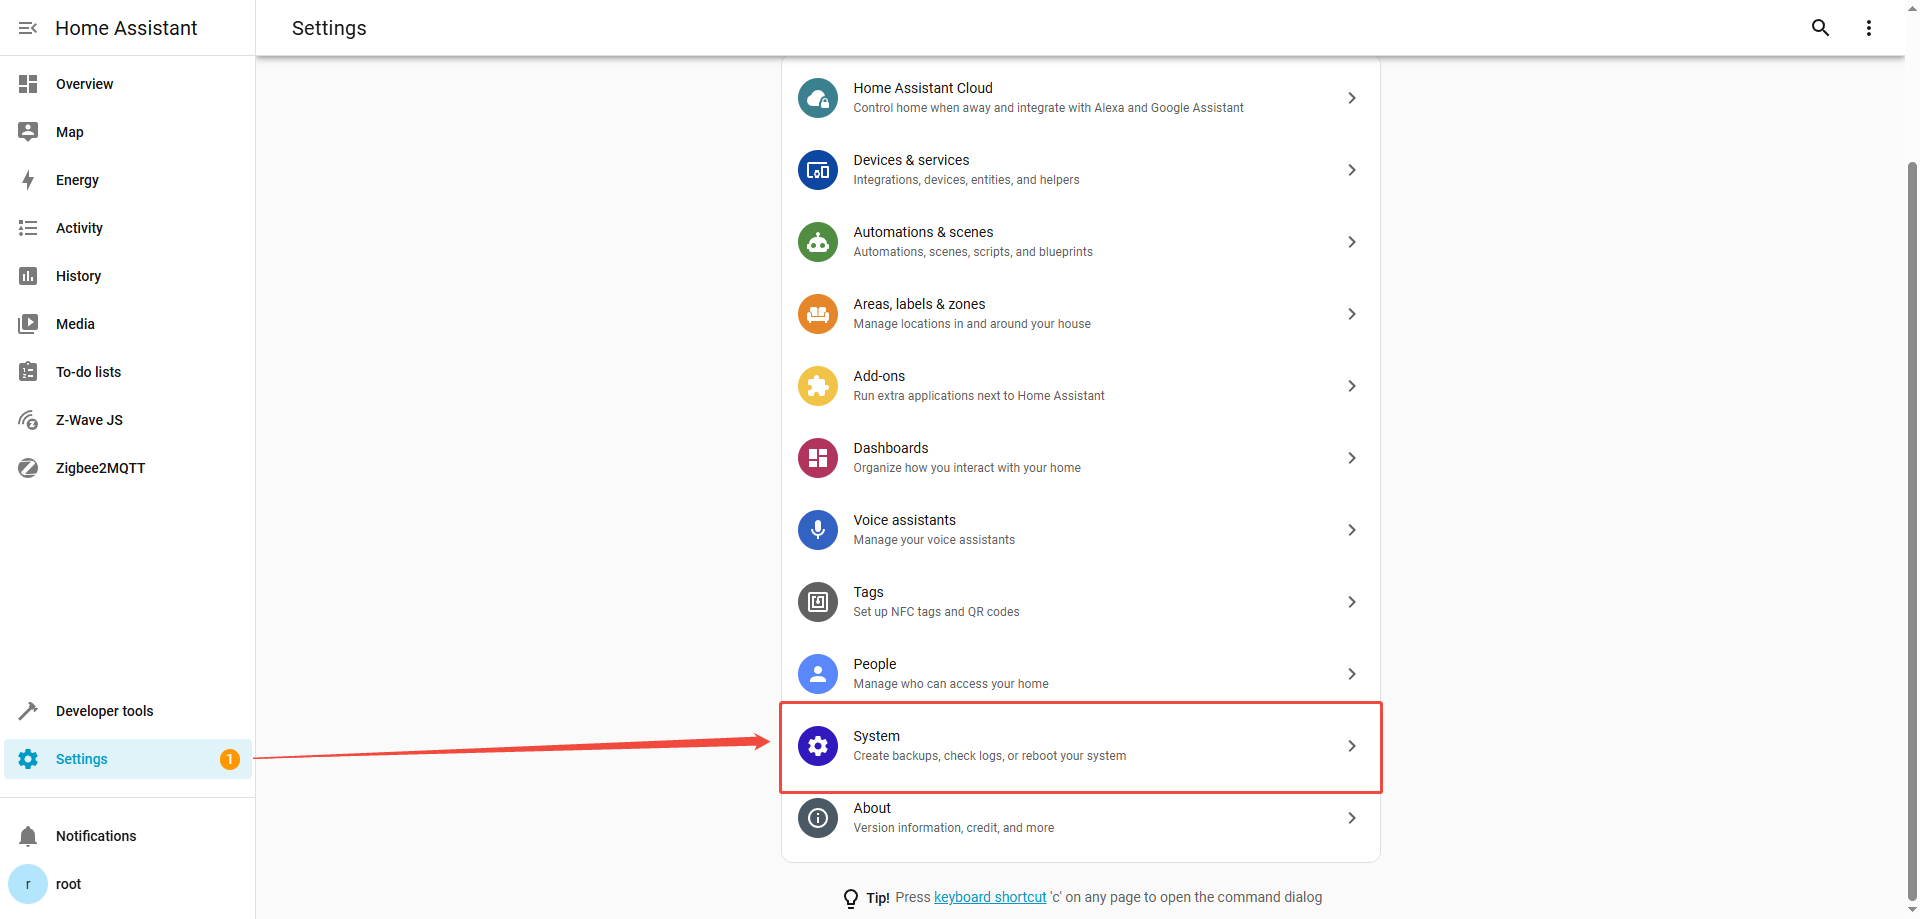
After logging into the HA interface, select "Settings" from the left navigation bar, then choose "System".
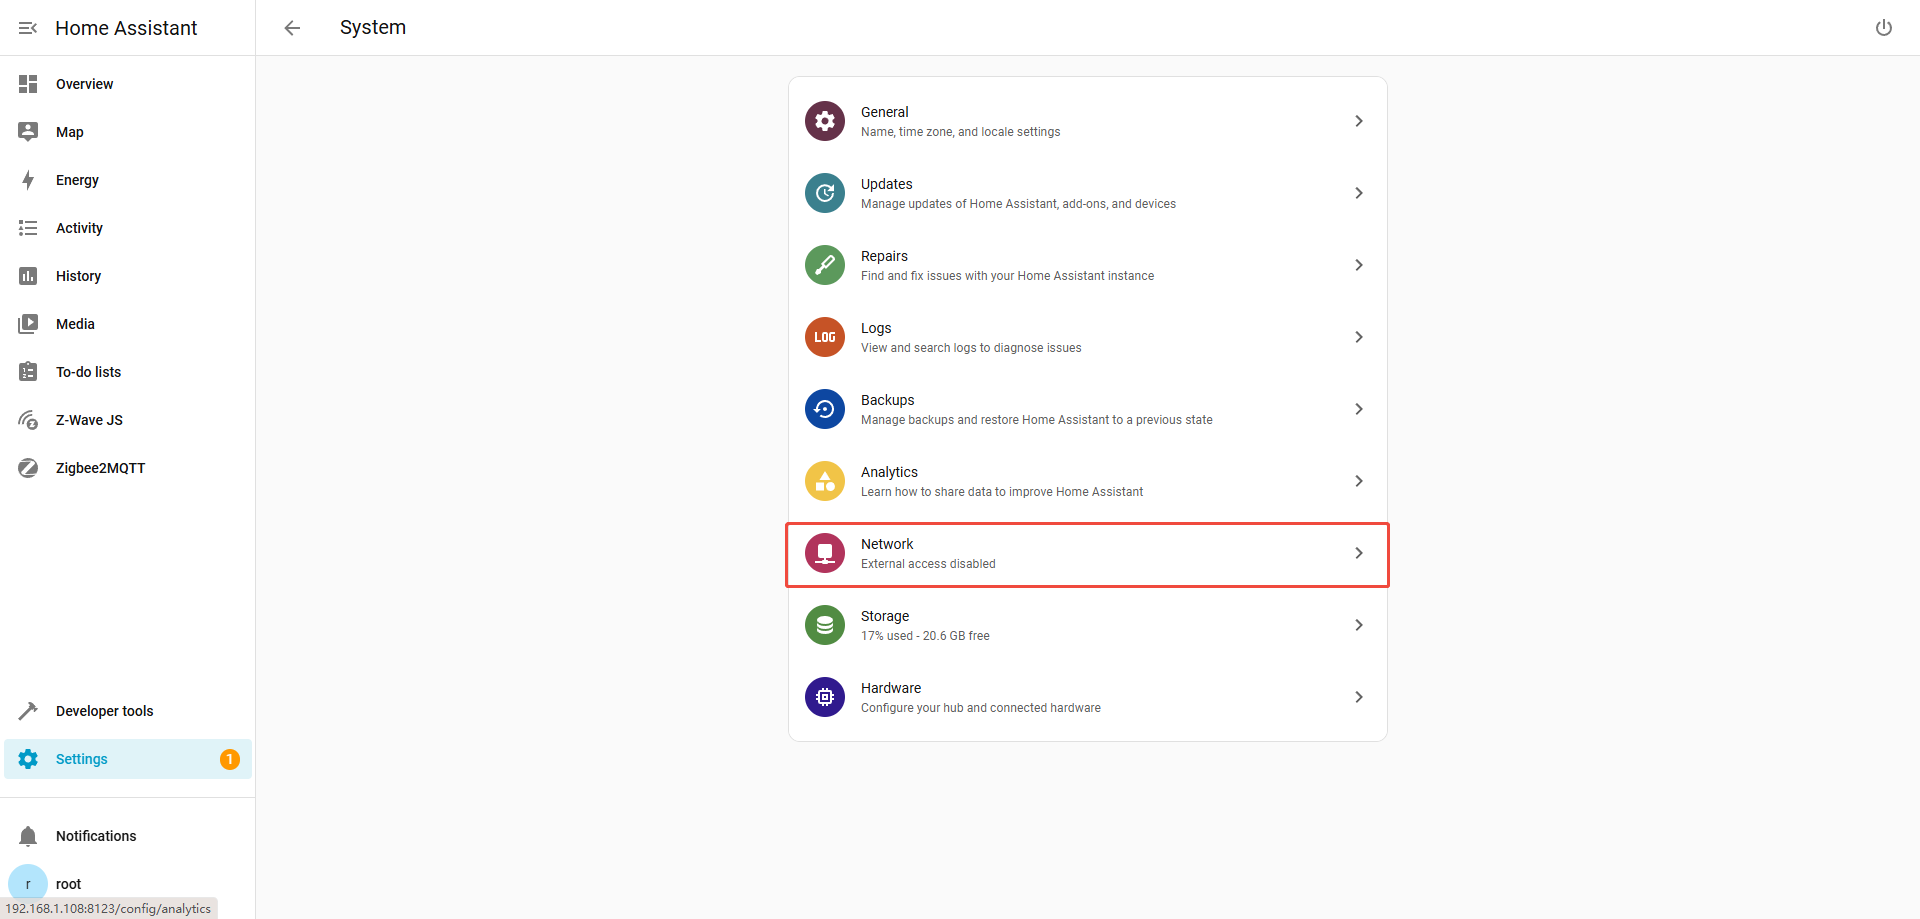
 Click Network
3.5.1 WAN
eth0 supports DHCP and static configuration
3.5.2 WIFI
Click "Search networks" for wlan1, select your Wi-Fi network, enter the password, and connect.

3.6 LTE
After powering off the gateway, insert the SIM card. Then power on the gateway — LTE will automatically initiate dial-up.
4 Battery Operations
Ture off battery:
1.Press and hold the function key for over 5 seconds, then release to turn off the battery.
2.Double-press the function key to turn off the battery immediately.
Note: When the battery is turned off while the gateway is powered by an adapter, the LED indicators will temporarily turn off, but the gateway continues operating normally.